Daily planning workflow
Applies to v1.7+ · ~4 min read · Plan routes
Run through the Route Planner from start to finish — import today's jobs, optimize, review the result, and send driver manifests out the door.
What carries over
Your vehicles and saved mappings persist day to day. Each morning you only need to bring in the day's jobs.
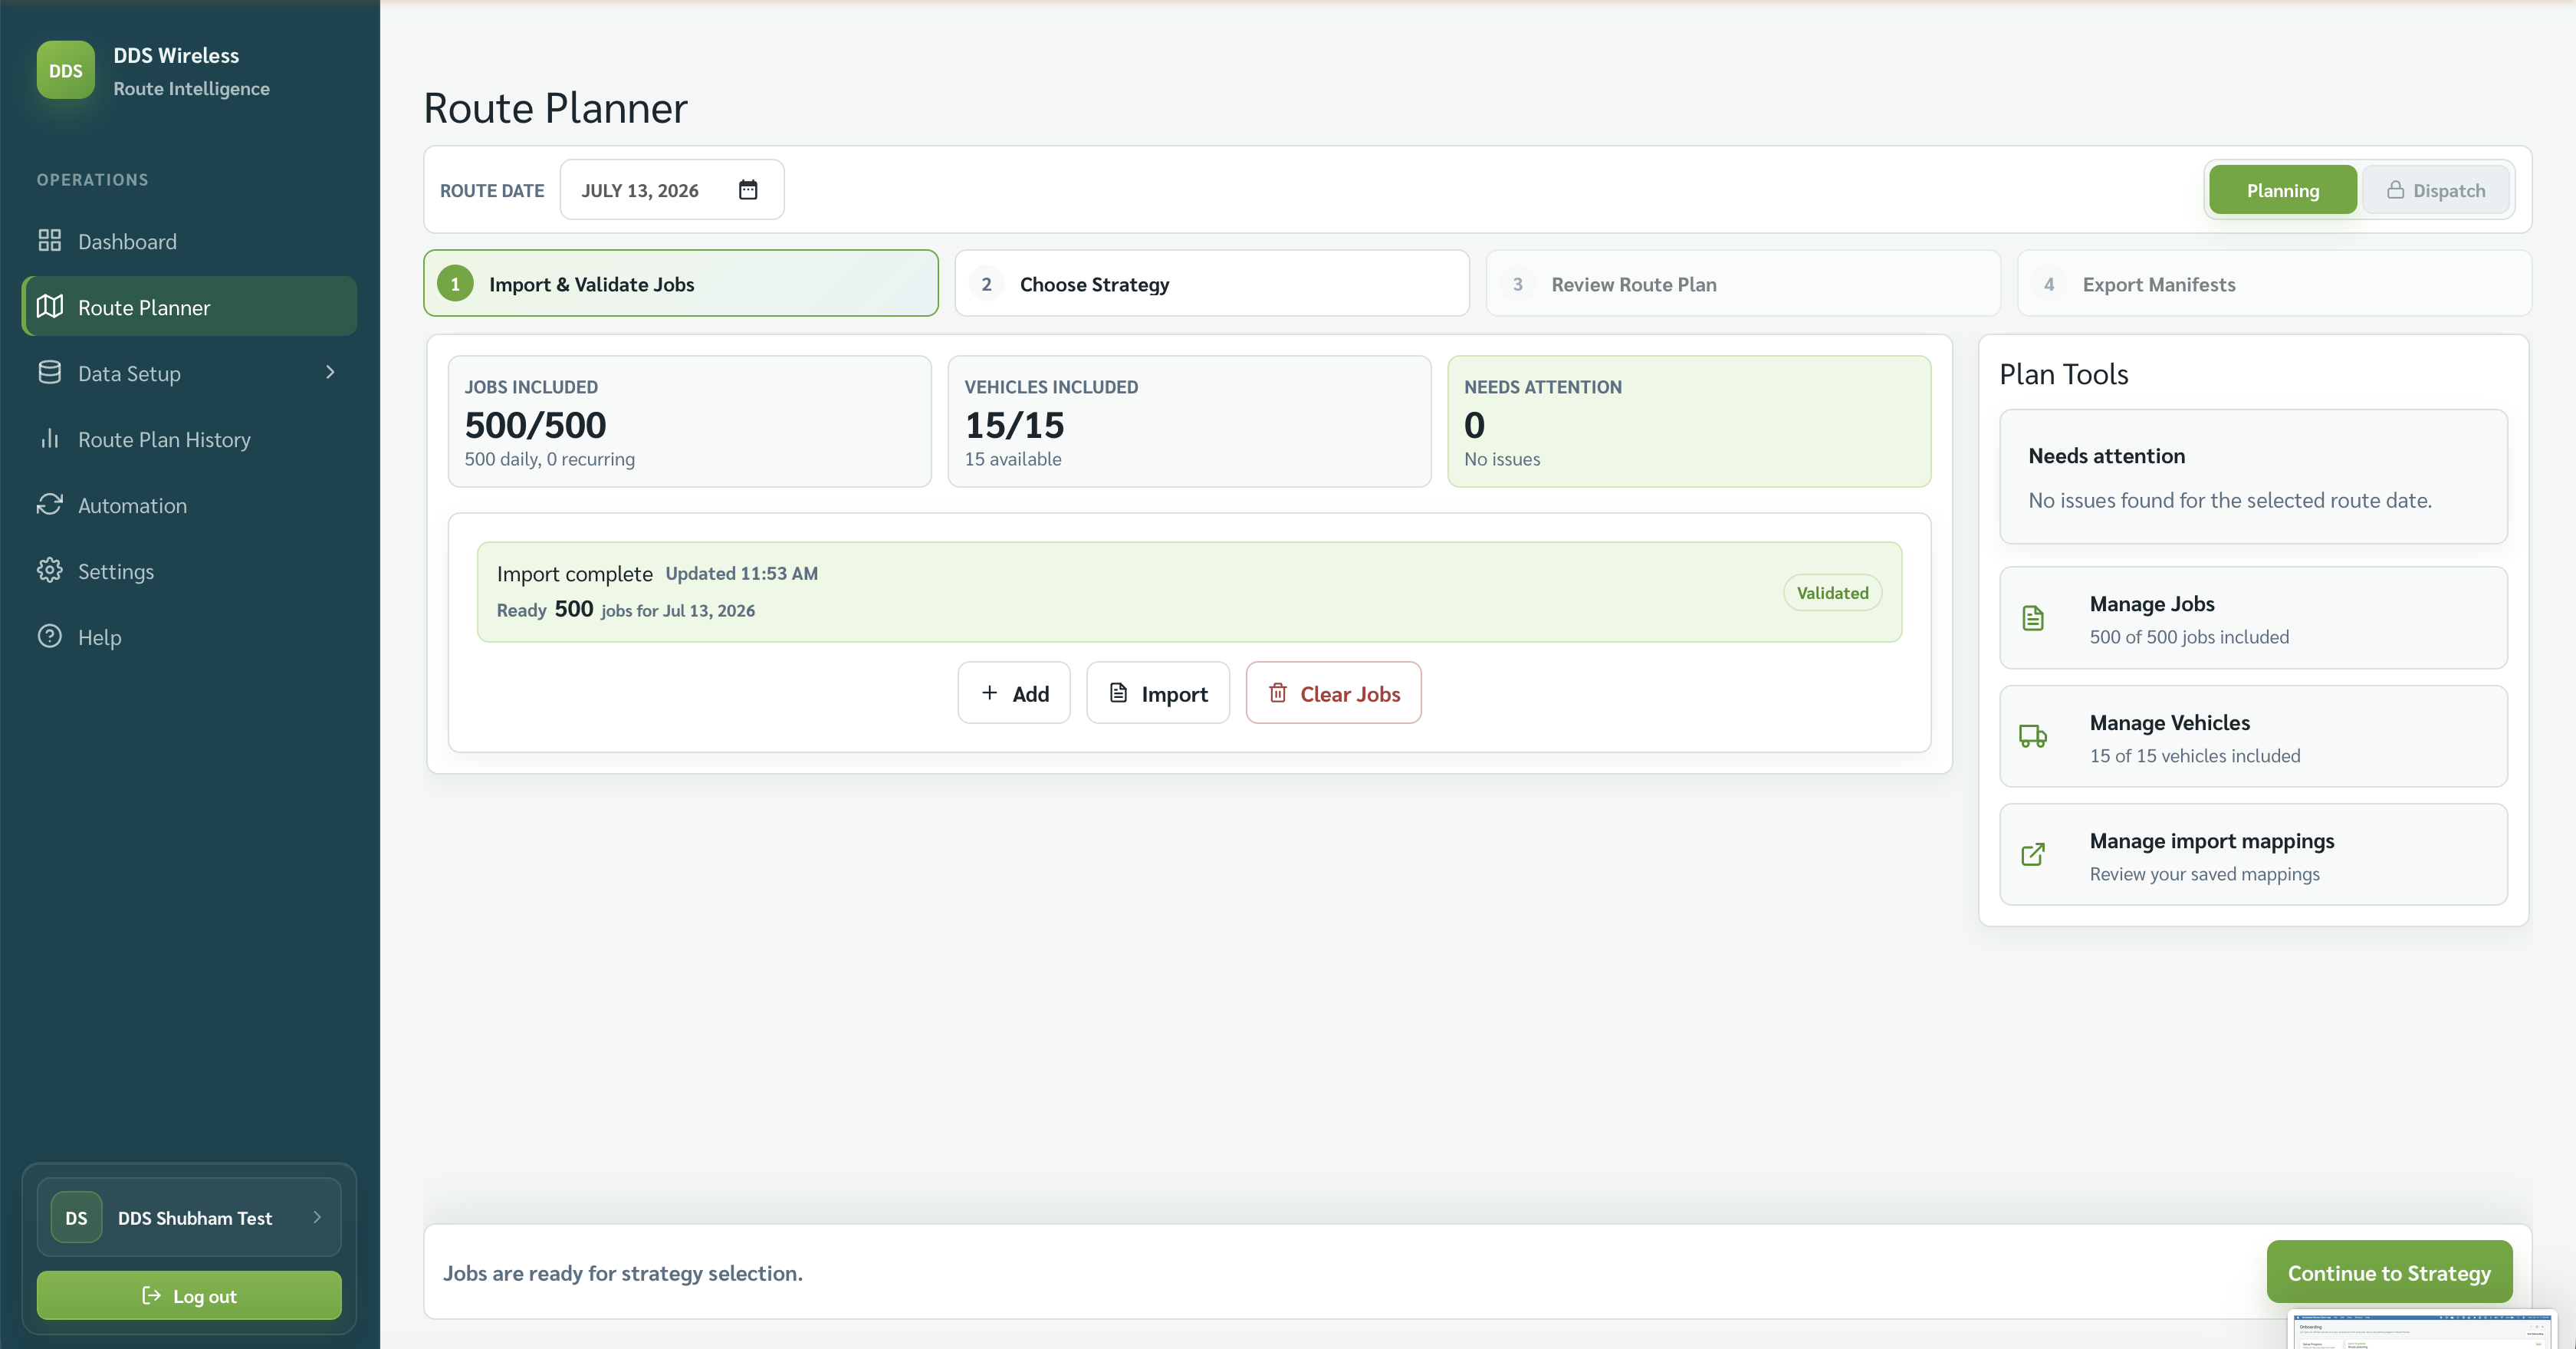
1. Open Route Planner and set the route date
In the left nav, select Route Planner. At the top of the screen, confirm the Route date is set to today (or the date you're planning for). Adjust it with the date picker if needed.
2. Import and validate jobs
On the Import & Validate Jobs step, load your jobs file using one of two methods:
- Drag and drop — drag your CSV or Excel file directly onto the drop zone.
- Browse Files — select Browse Files and pick the file from your system.
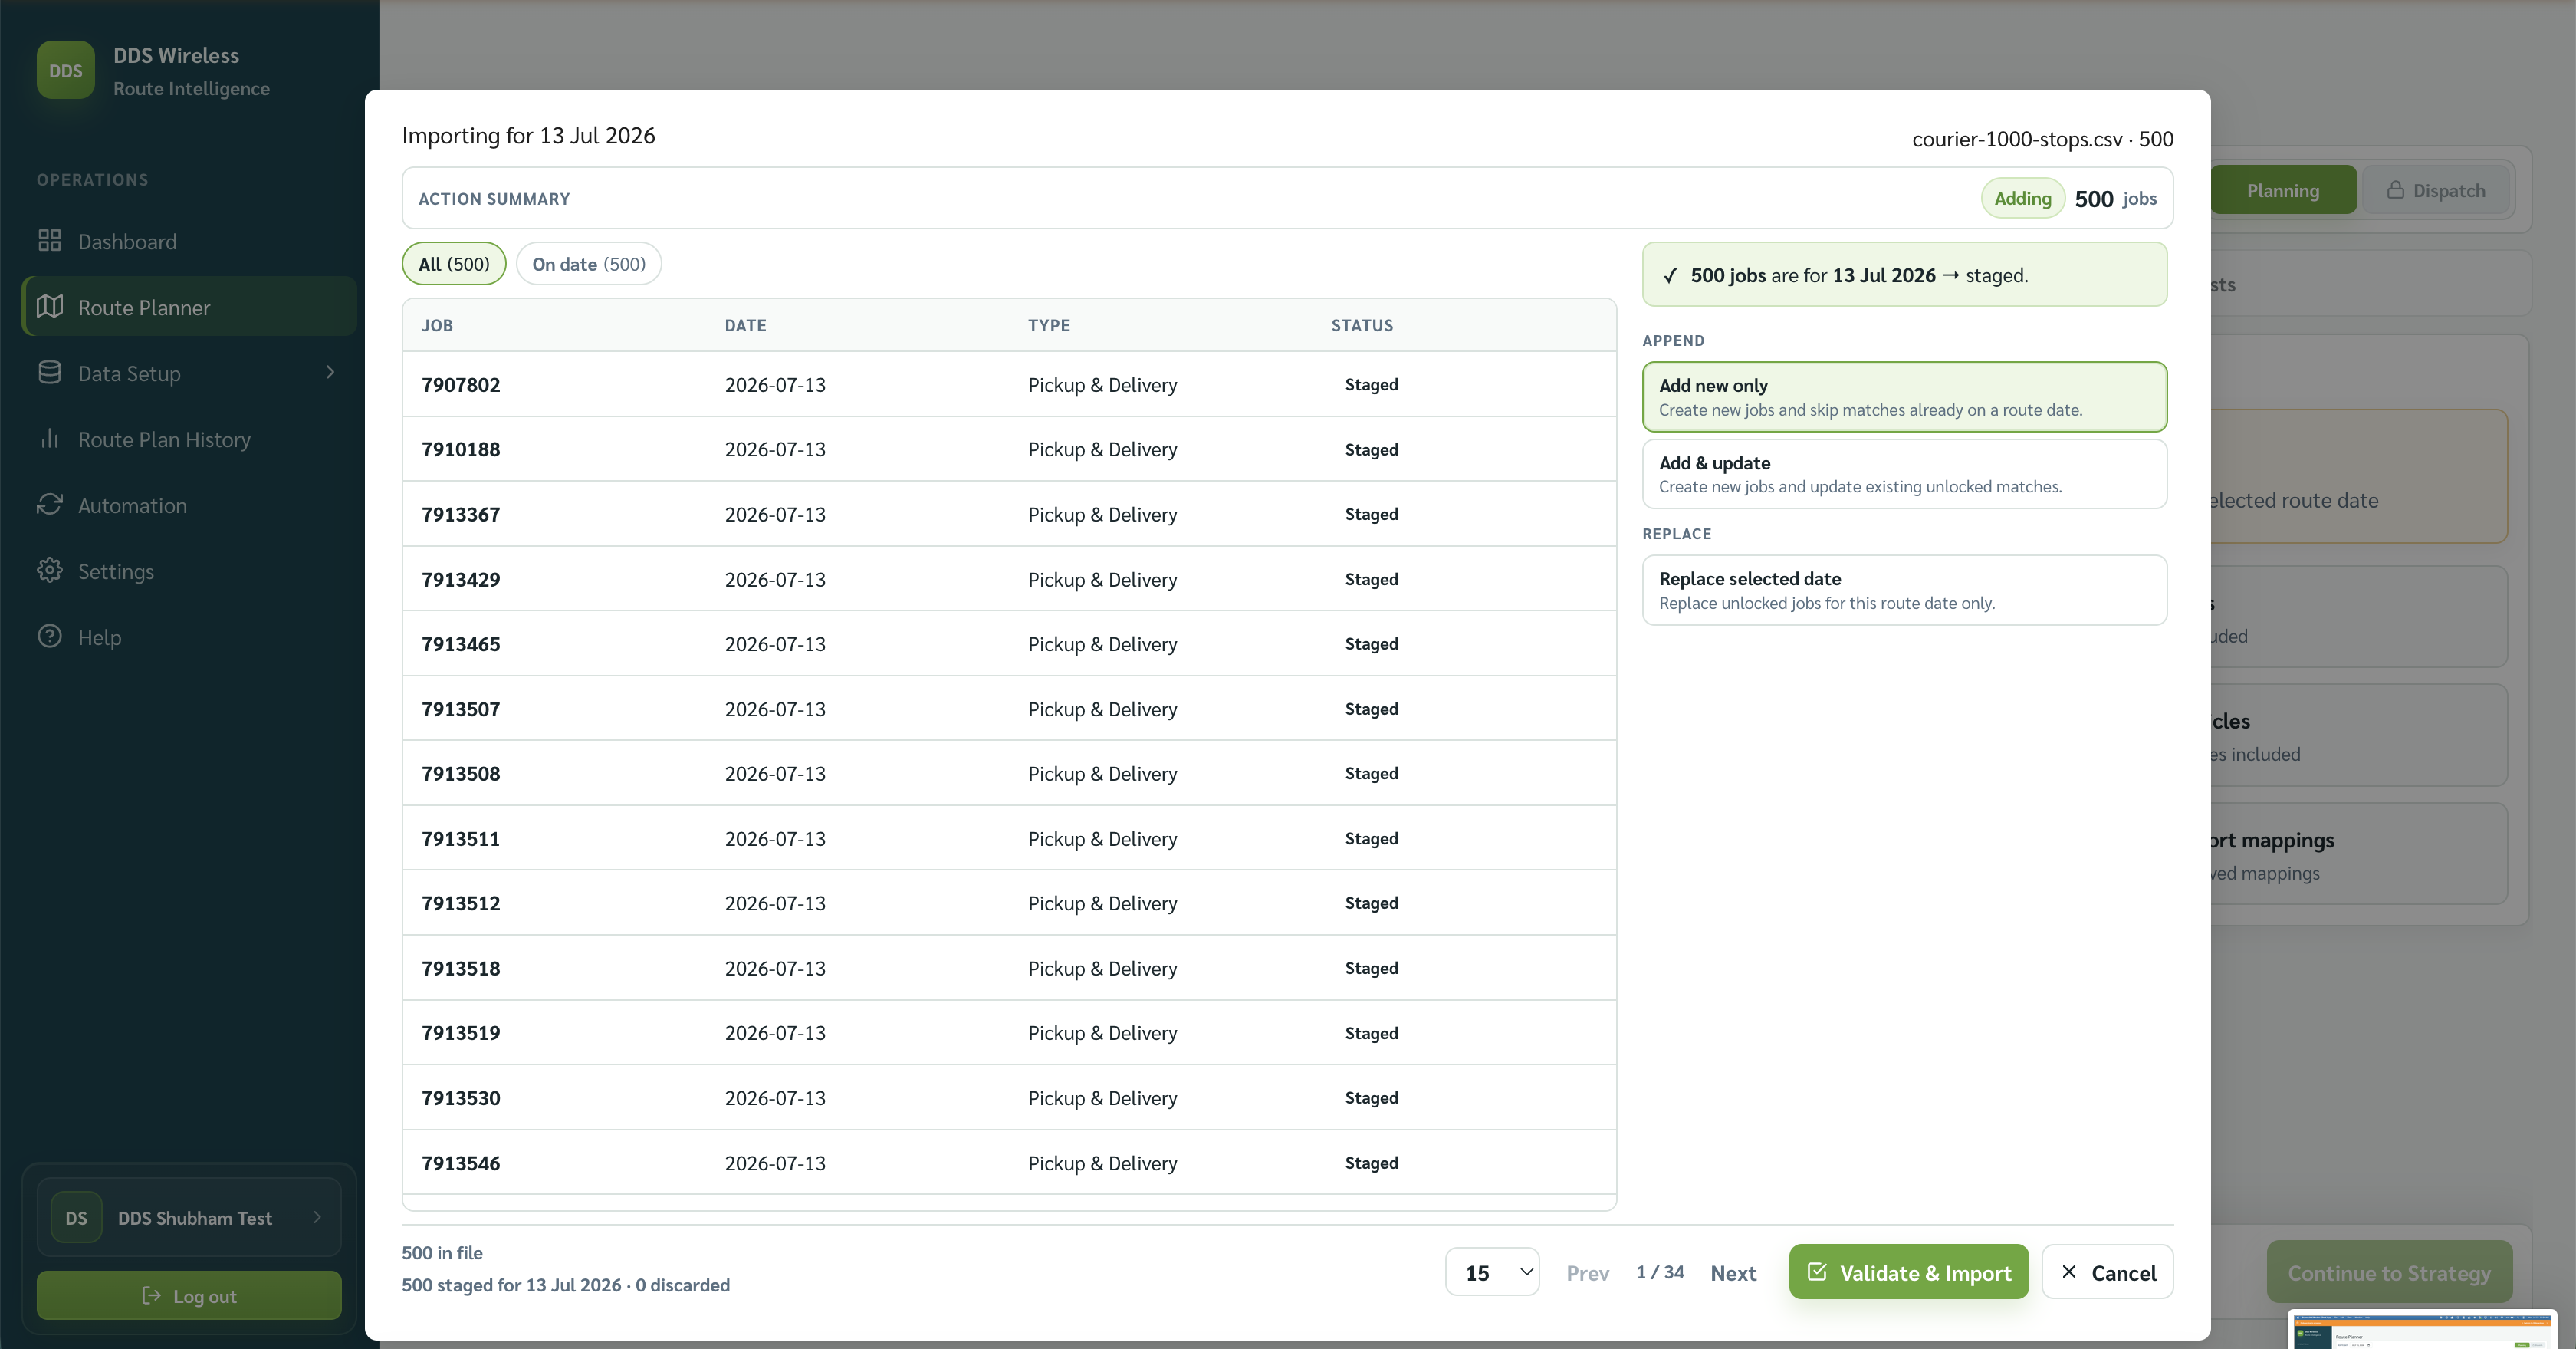
Review and stage the jobs
Choosing a file opens the staging review — nothing enters your plan until you confirm. The modal lists every job in the file (JOB, DATE, TYPE, STATUS), with an Action Summary at the top (for example, Adding 500 jobs) and a running tally at the bottom (500 in file · 500 staged for 13 Jul 2026 · 0 discarded). Use the All and On date tabs to switch between every row and only those matching the route date.
How dates are handled. The staging panel sorts jobs by their date against the route date and resolves each date group on its own:
| Job's date | What happens |
|---|---|
| Matches the route date | Staged automatically |
| No date in the file | Assigned to the route date |
| A future date | Choose Schedule for future, Move to route date, or Discard |
| A past date | Choose Move to route date or Discard |
Merging with jobs already on the date. If the route date already holds jobs, choose how this file combines with them:
| Option | What it does |
|---|---|
| Add new only (Append) | Create new jobs and skip matches already on the route date |
| Add & update (Append) | Create new jobs and update existing unlocked matches |
| Replace selected date (Replace) | Replace unlocked jobs for this route date only |
Locked jobs are protected
Add & update and Replace only affect unlocked jobs. A locked job is never overwritten or dropped — it is reported as skipped. Replace also leaves scheduled-ahead jobs (for other dates) untouched.
When the staging looks right, select Validate & Import. The app validates the file and brings the staged jobs into your plan.
After importing, the Import & Validate Jobs step shows three summary cards:
| Card | What to check |
|---|---|
| Jobs included | Count matches what you expect for the day |
| Vehicles included | All active vehicles are present |
| Needs attention | Any issues flagged here should be resolved before continuing |
Need to swap or add files?
Use Import More Jobs to append additional jobs, Replace Jobs to swap the file entirely, or Clear Jobs to start fresh. Add lets you add individual jobs manually.
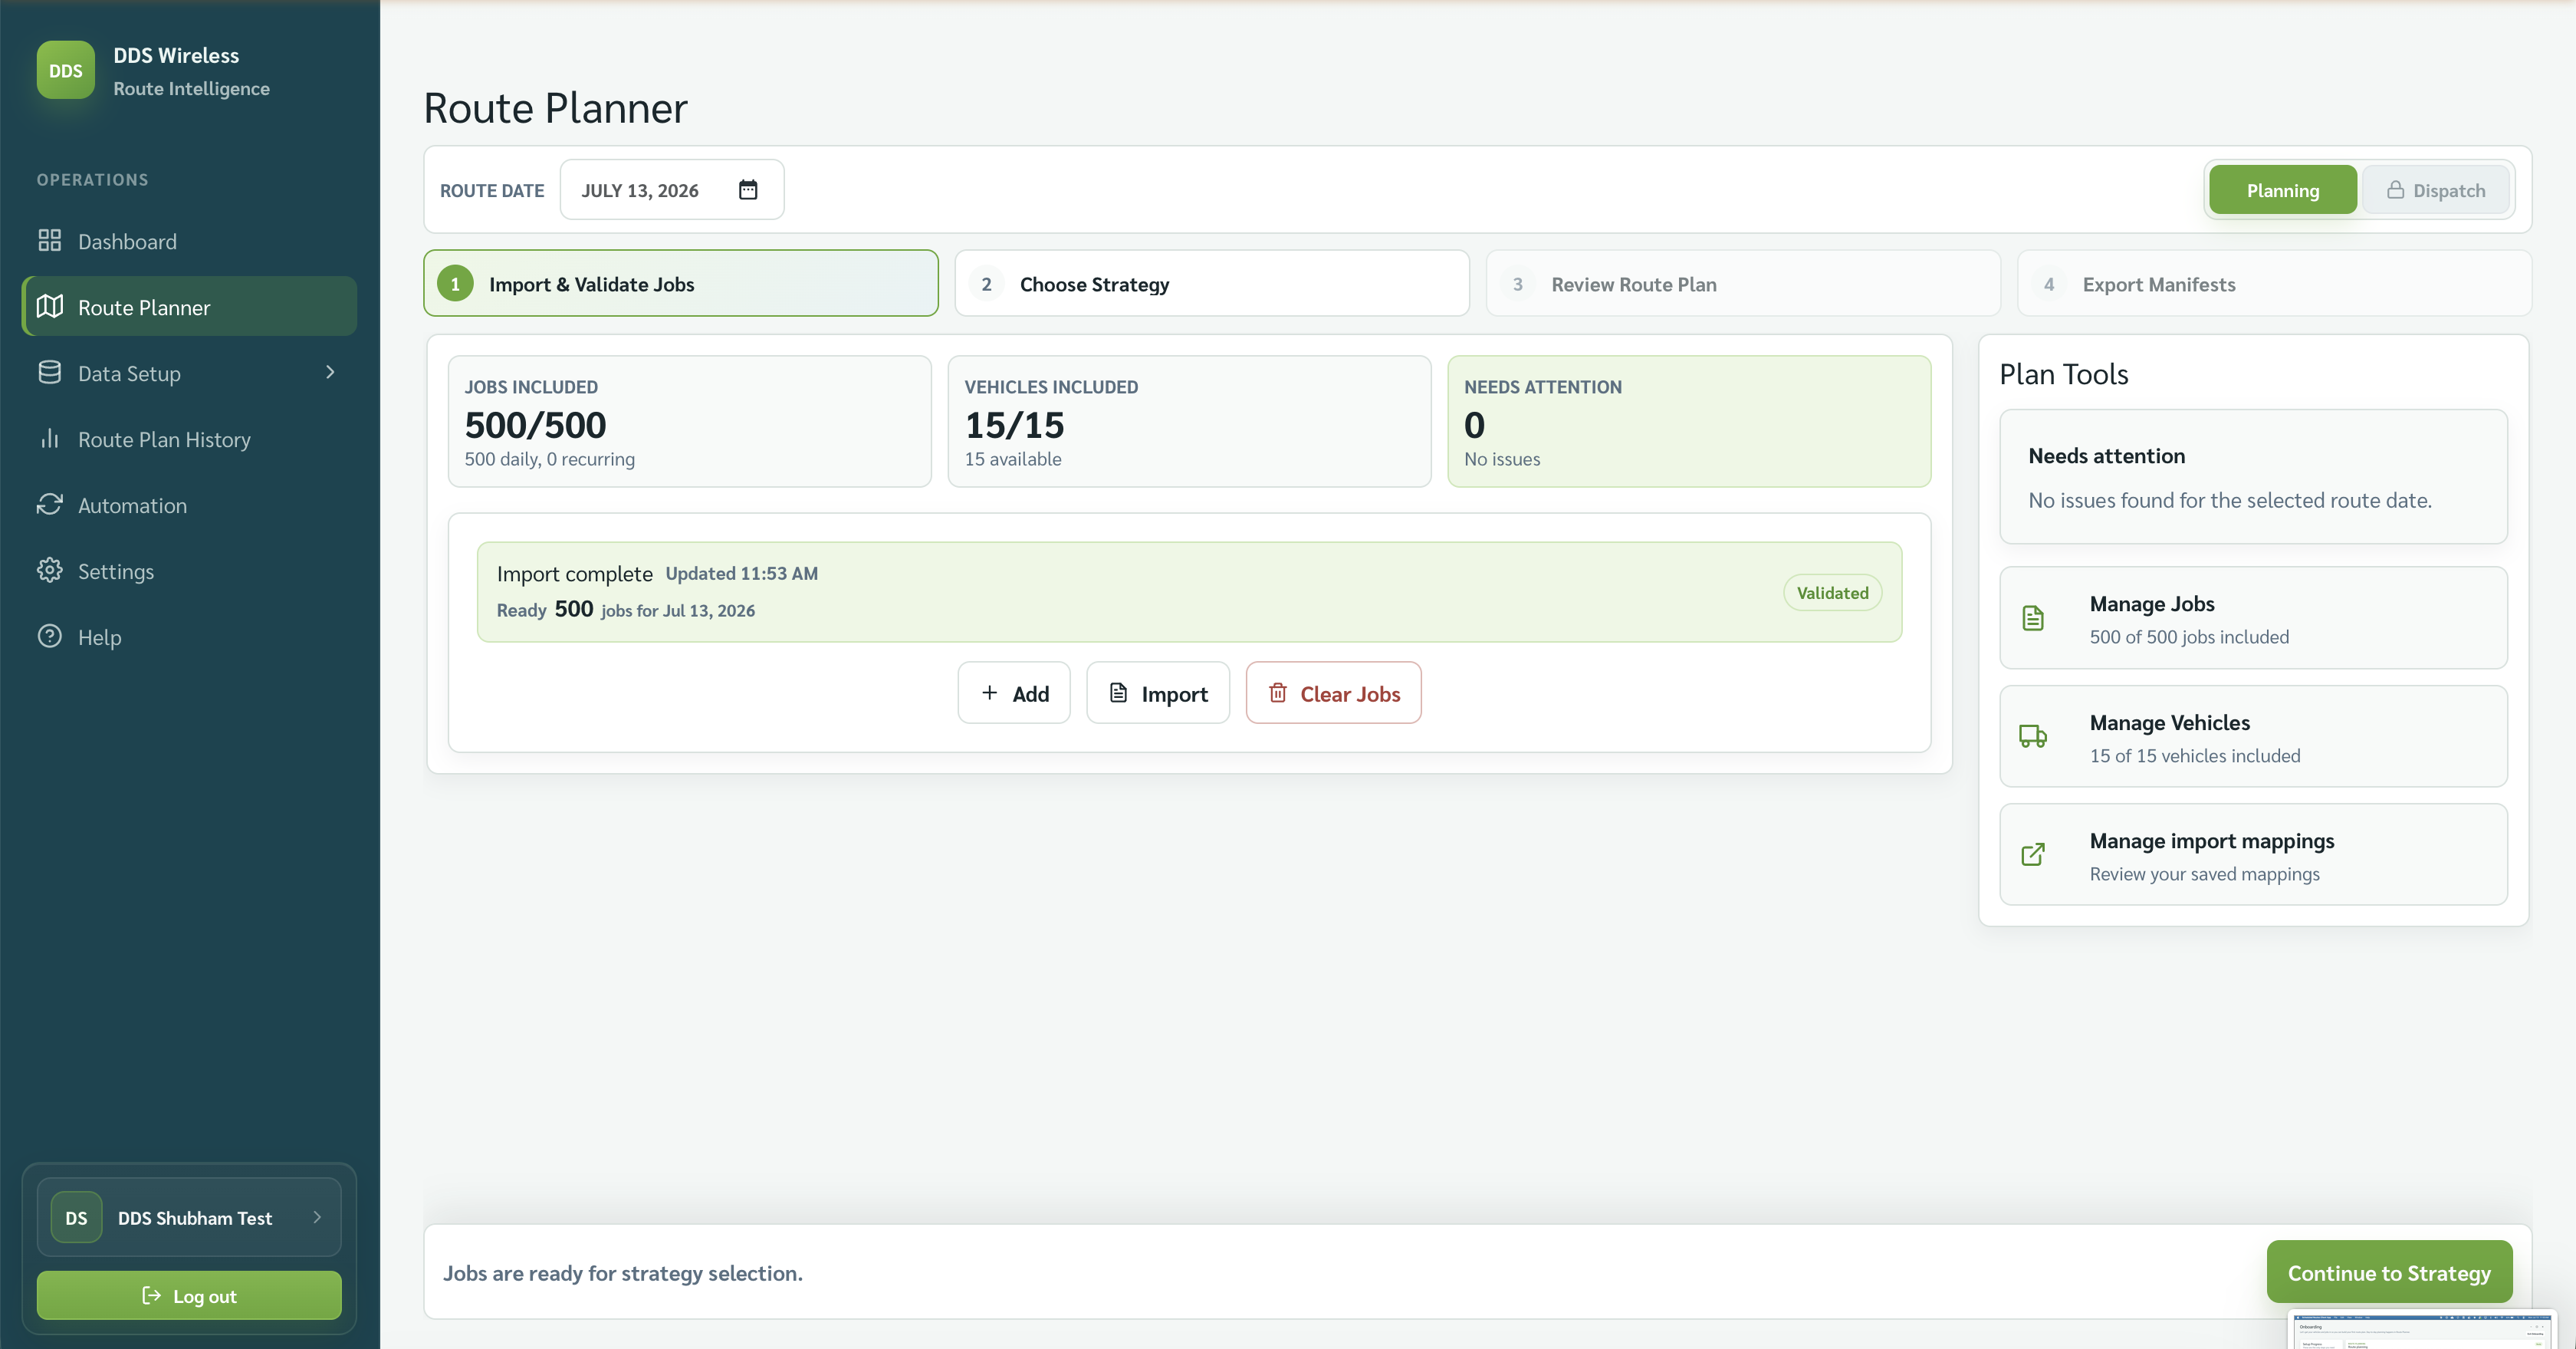
When the counts look right and Needs attention is clear (or reviewed), select Continue to Strategy.
3. Choose a strategy
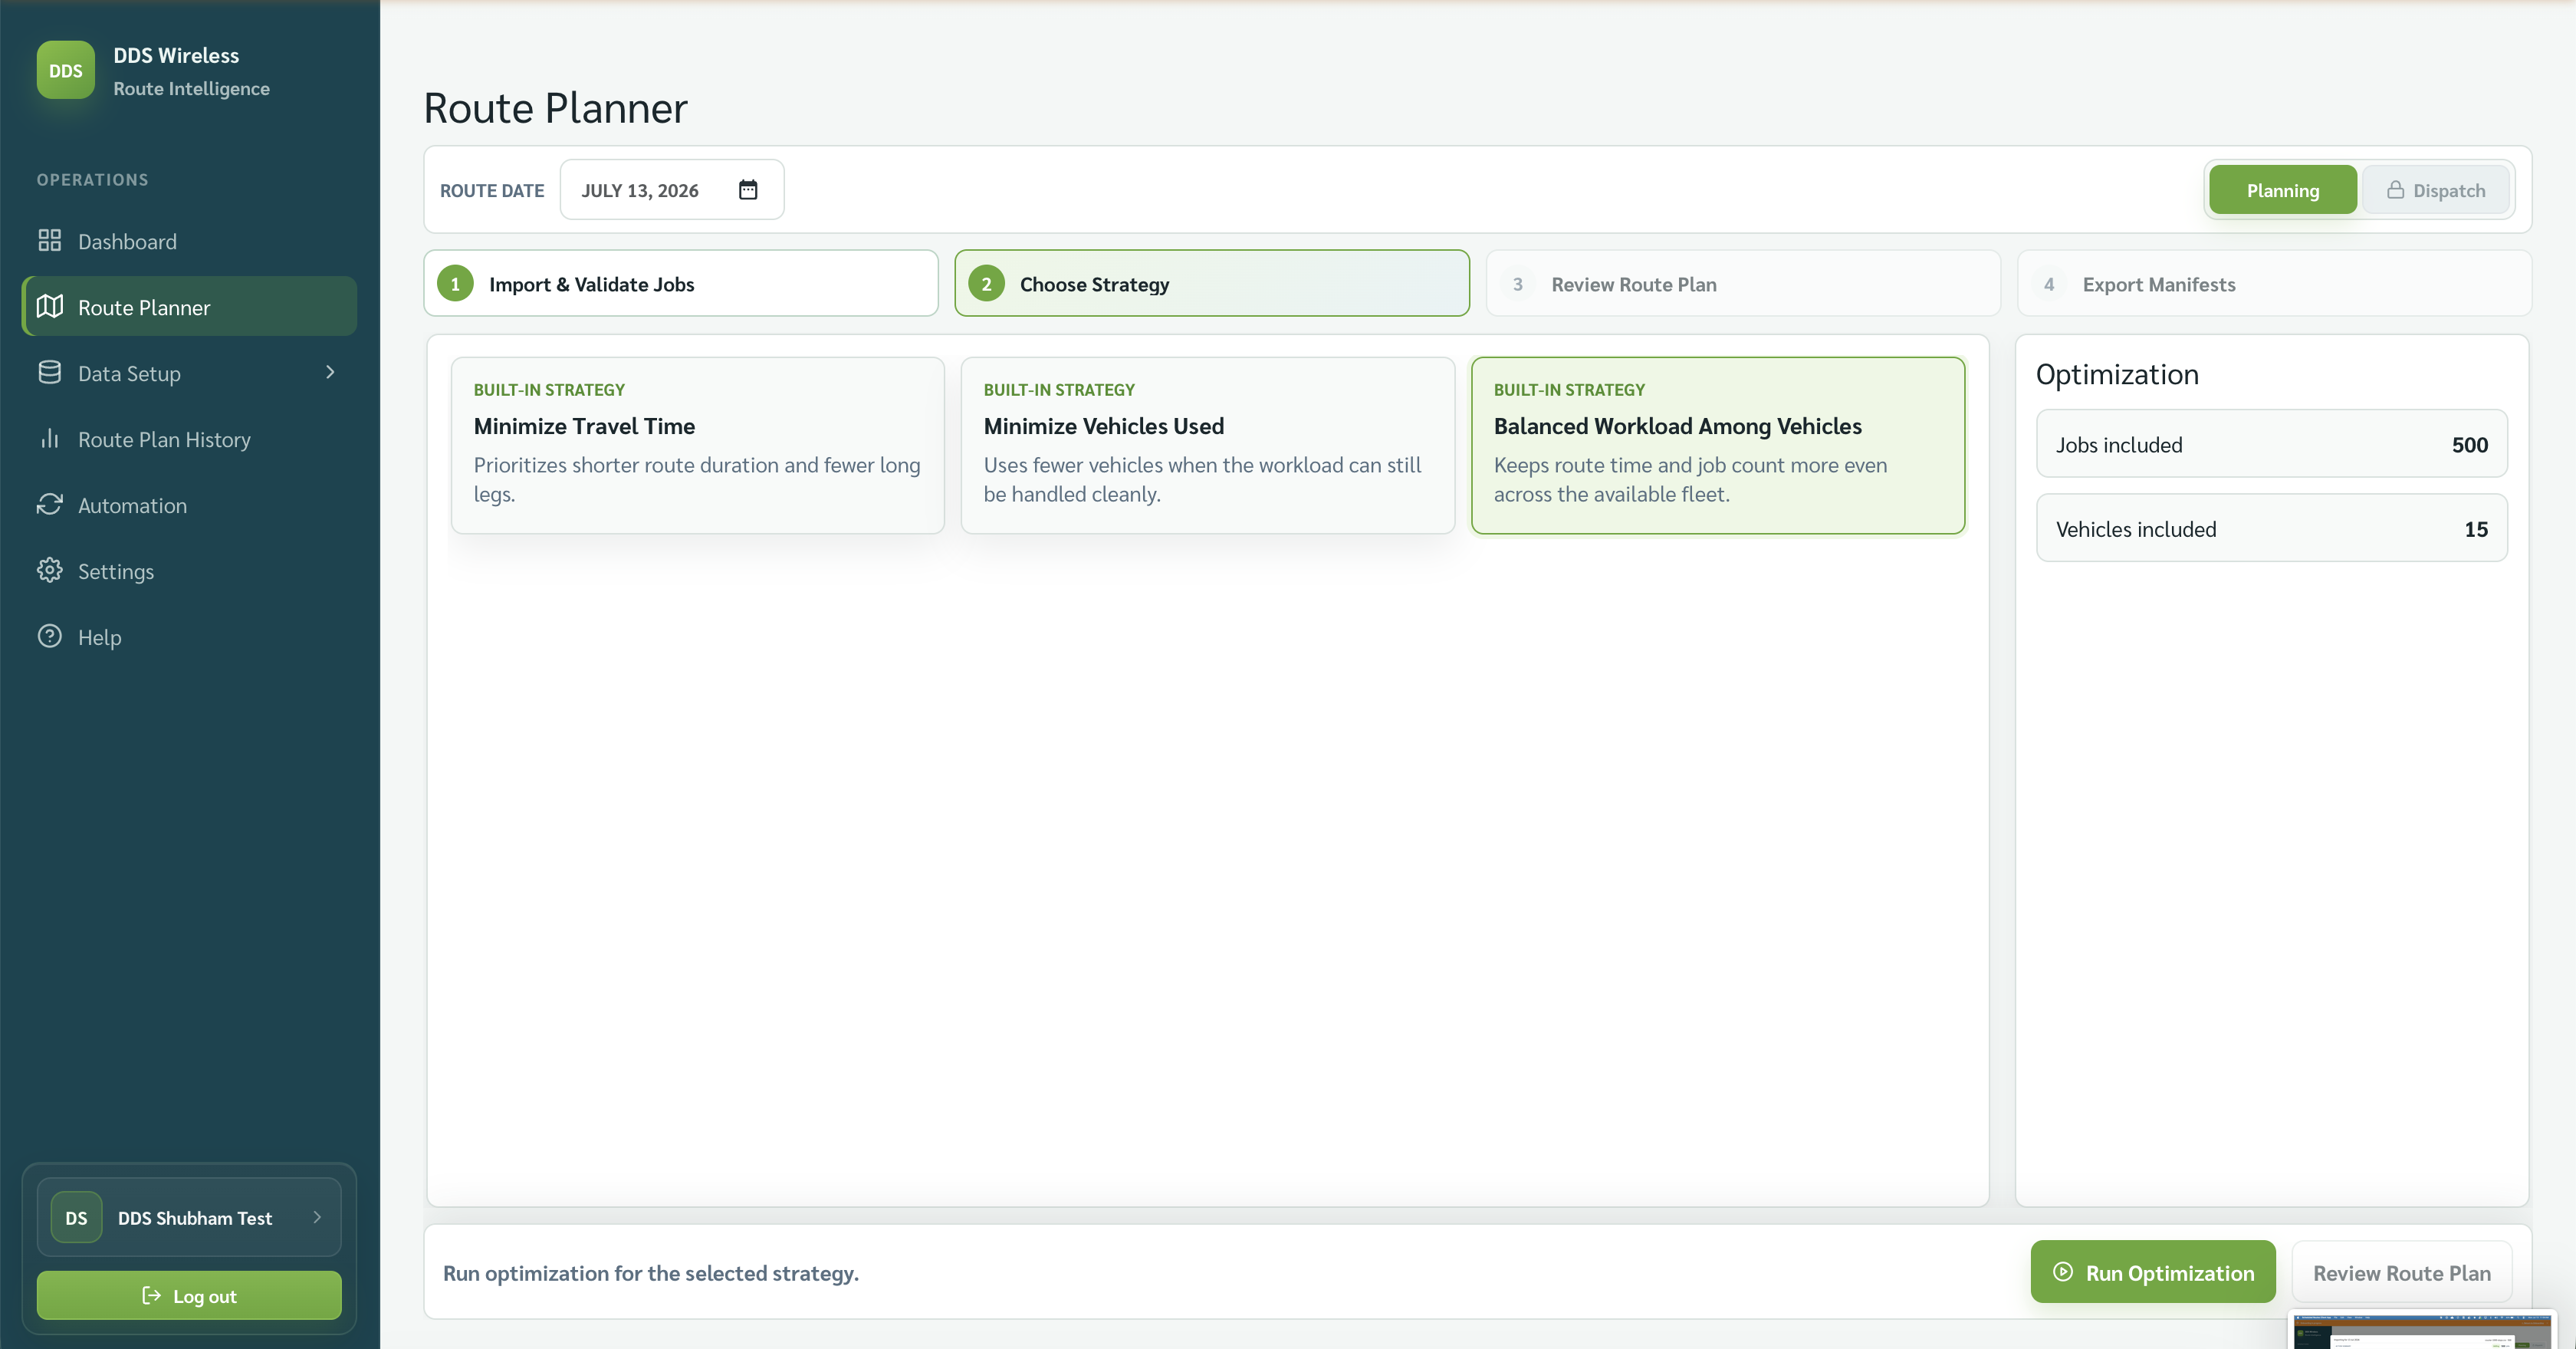
On the Choose Strategy step, select one of the three strategy cards. Optimization runs automatically as soon as you pick one.
| Strategy | Choose when |
|---|---|
| Minimize Travel Time | Least total driving is the priority |
| Minimize Vehicles Used | Fewer vehicles on the road is the priority |
| Balanced Workload Among Vehicles | Even time and jobs across all drivers |
For help deciding, see Choosing a strategy.
4. Review the route plan
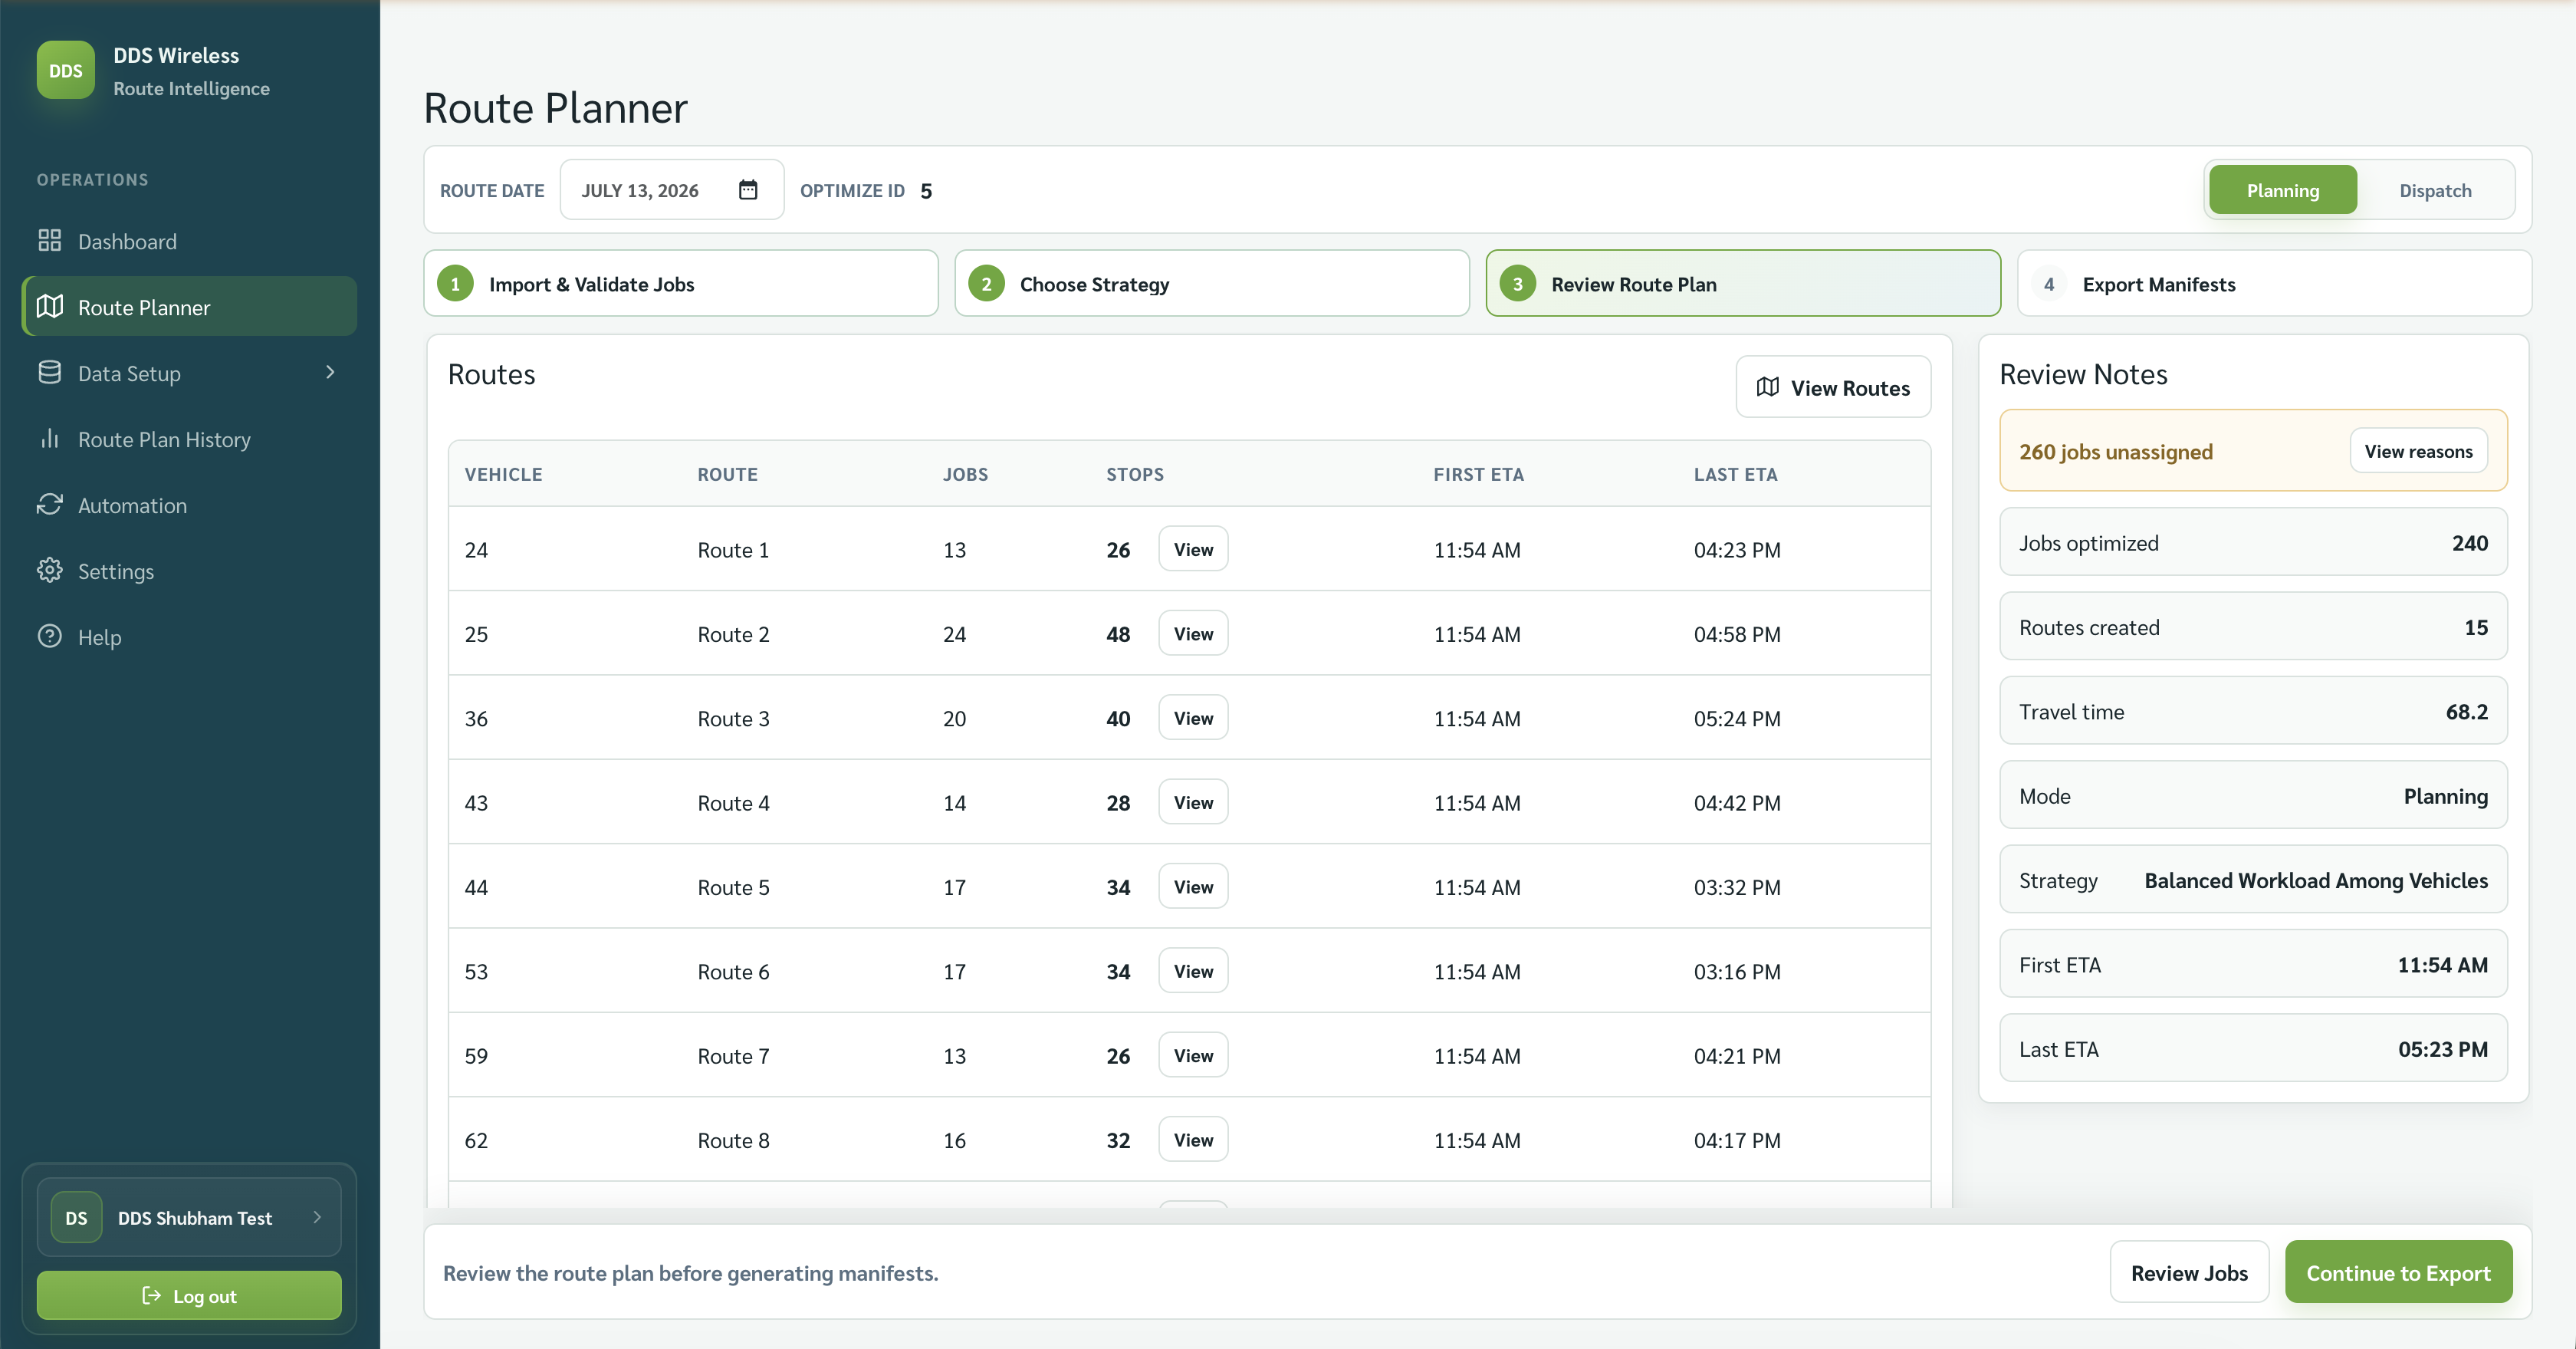
On Review Route Plan, check the summary cards and the Routes table before committing to export.
Watch the unassigned count
If the Unassigned card shows a number above zero, select View reasons before proceeding. A high count usually means a quick data fix. See Fix unassigned jobs.
For a full walkthrough of this step, see Review the route plan.
When you're satisfied, select Continue to Export.
5. Export manifests
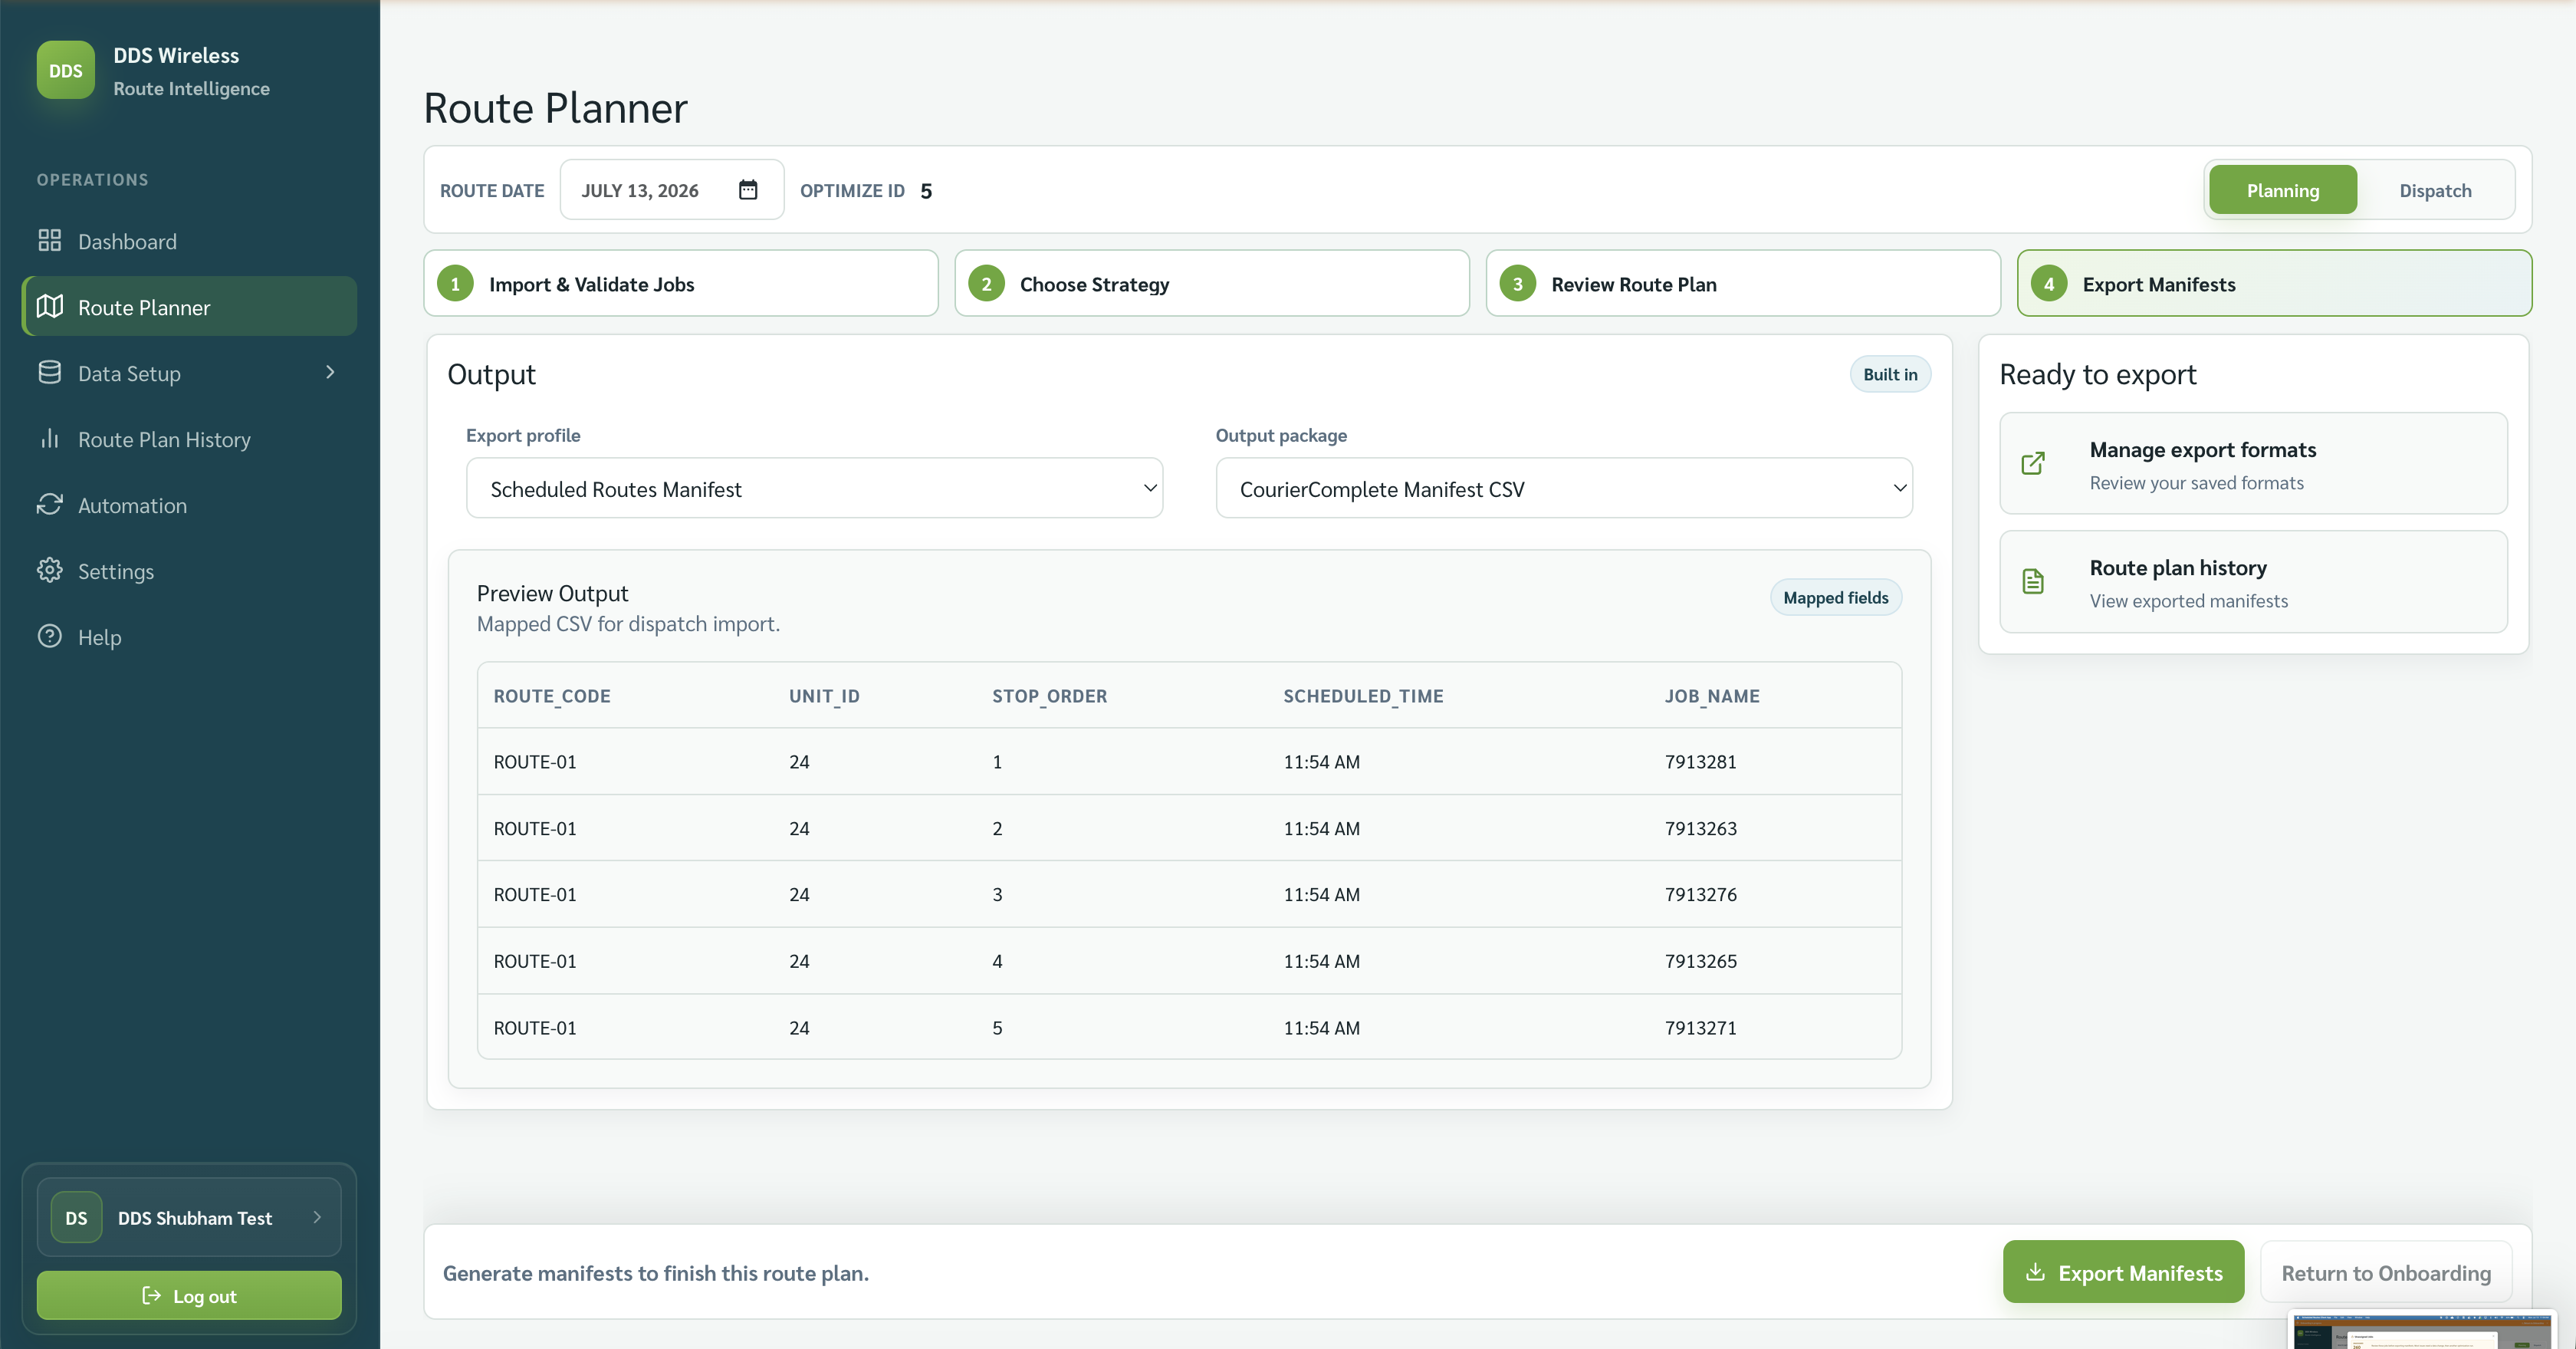
On Export Manifests:
- Select an Export profile from the dropdown (or use the default).
- Choose an Output package — PDF, Excel, or CSV.
- Select Export.
The manifest generates and is saved. If you need to make a change after exporting, return to an earlier step, adjust your data or strategy, and select Regenerate.
Past exports
All manifests are stored under Route Plan History — open them any time to re-export or review a previous day's plan.
Result
Your drivers have their manifests for the day. The optimization result stays saved under Route Plan History until you clear operational data or start a new plan for the same date.
Related: Choosing a strategy · Review the route plan · Fix unassigned jobs · Built-in exports