Manage vehicles
Applies to v1.7+ · ~4 min read · Import guides
Review, create, edit, disable, or delete the vehicle records used by Route Planner.
Open the vehicle list
Go to Data Setup → Manage Data and select Vehicles. Use search and the capacity, skills, cadence, and status filters to narrow the list.
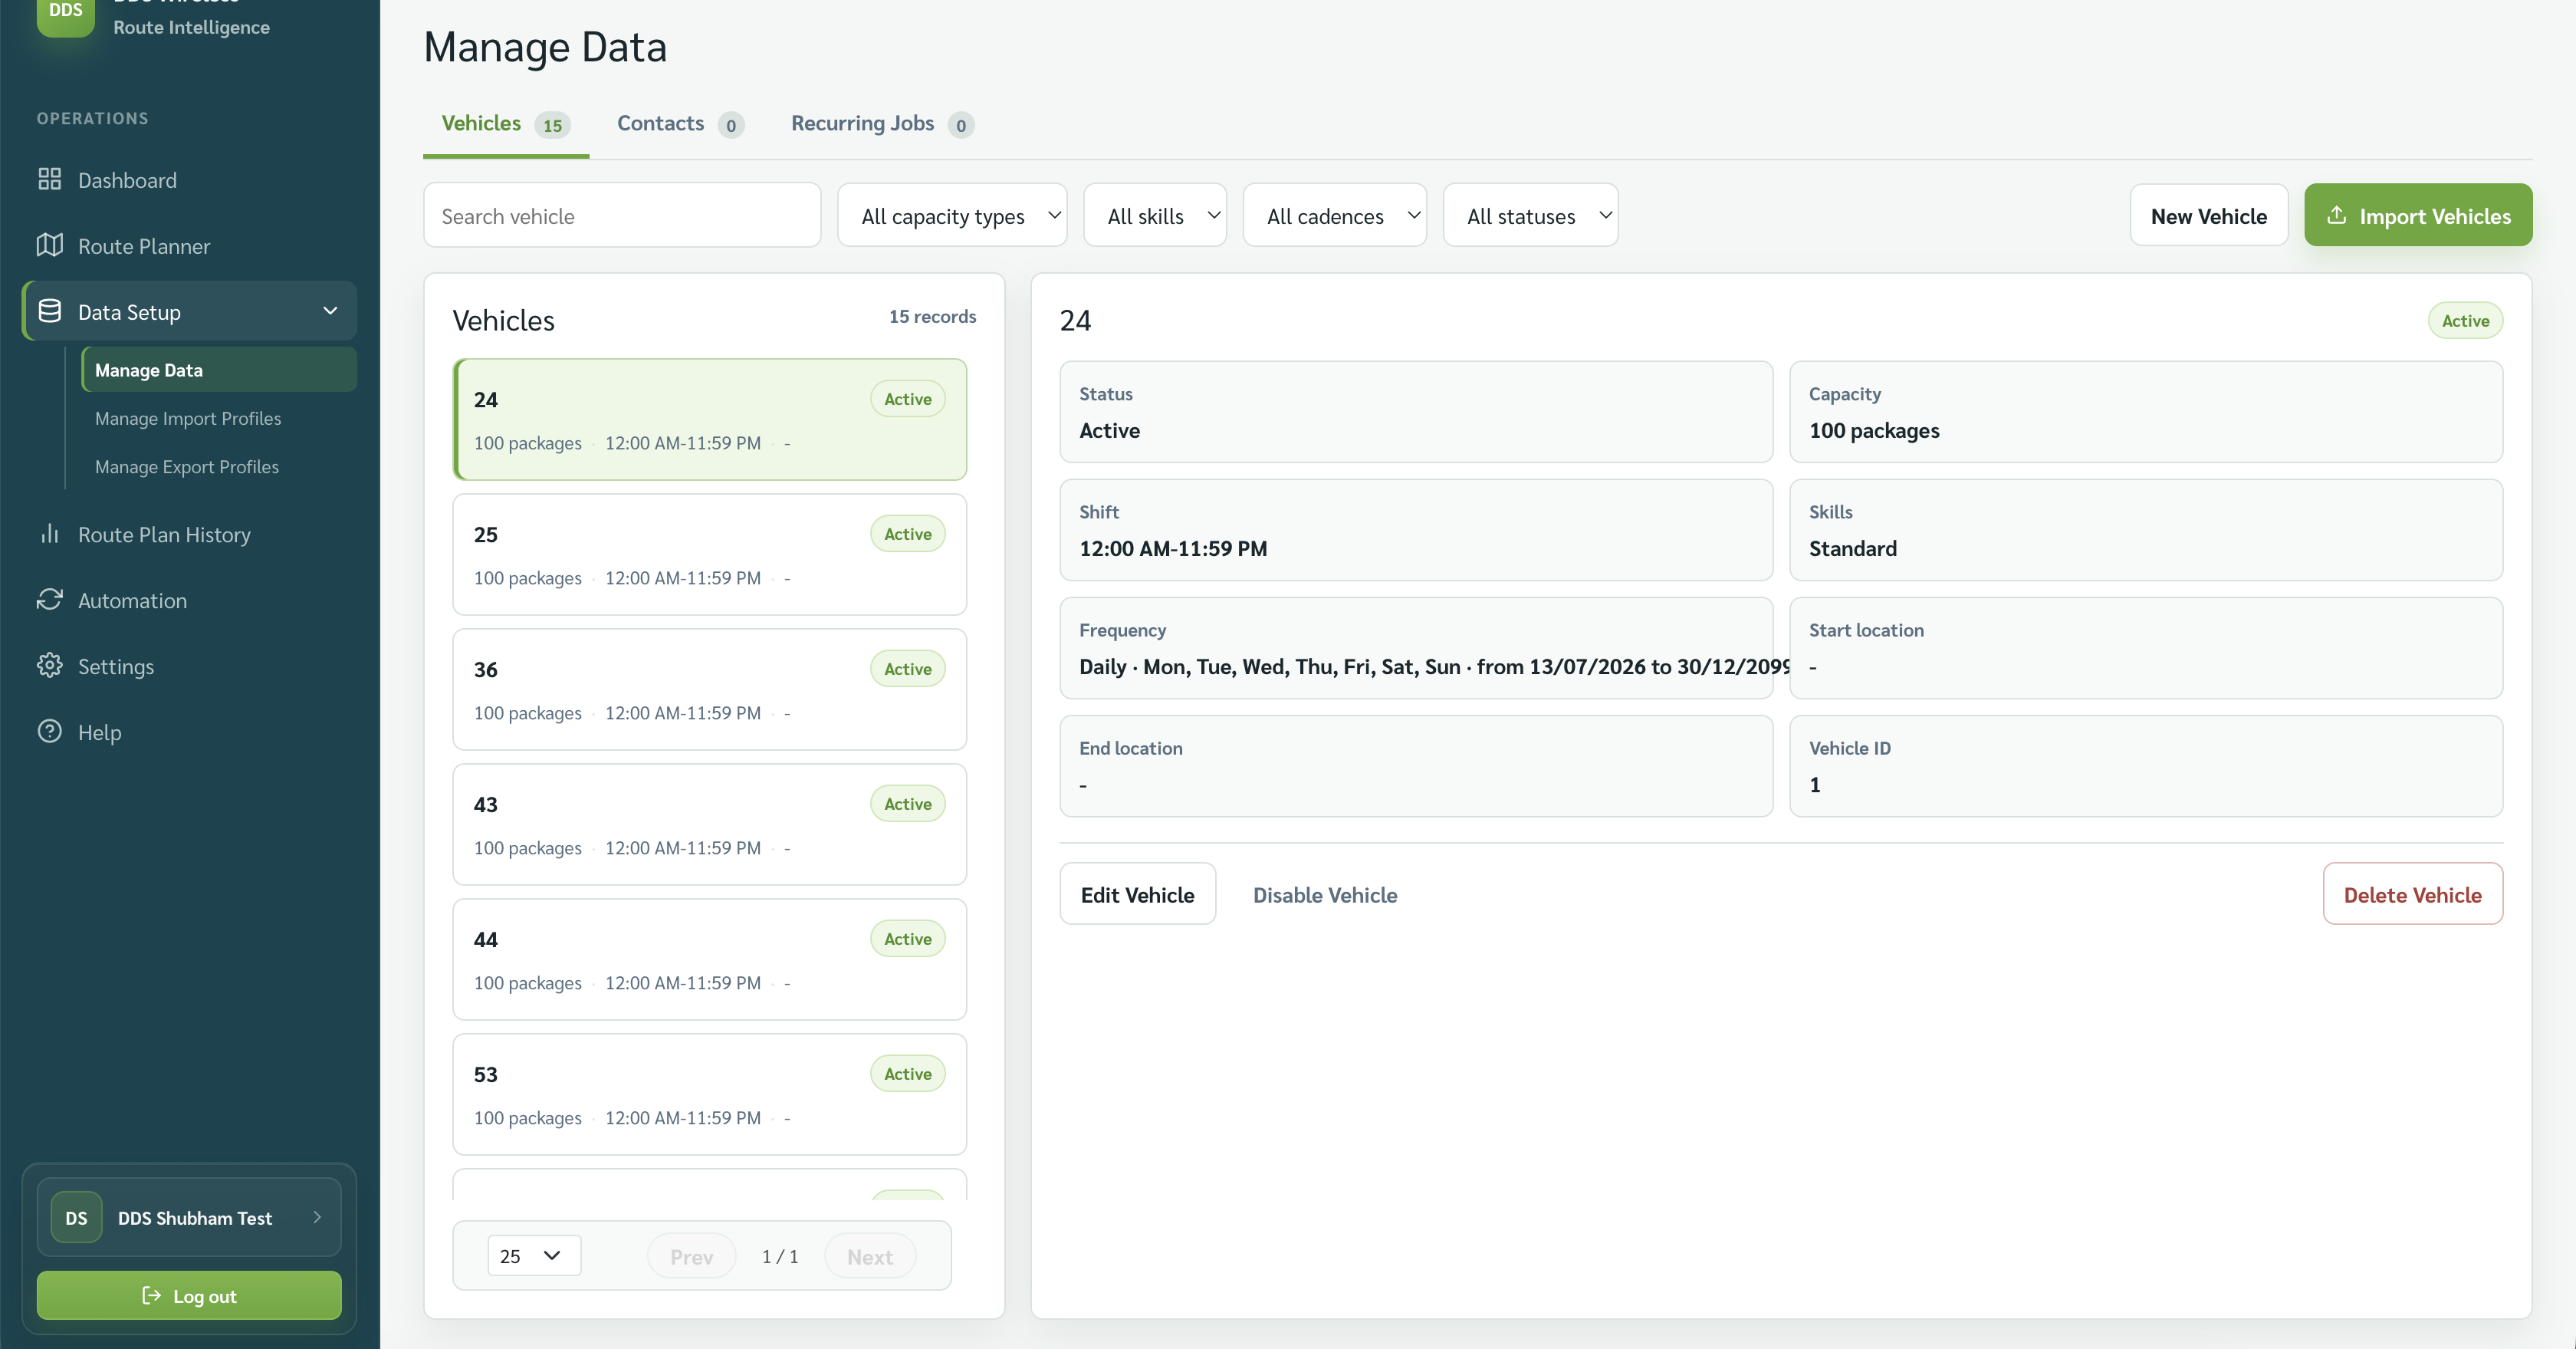
Edit a vehicle
- Select a vehicle.
- Select Edit Vehicle.
- Review Vehicle name, shift start and end, capacities, skills, Start location, End location, and frequency.
- Select Save Changes.
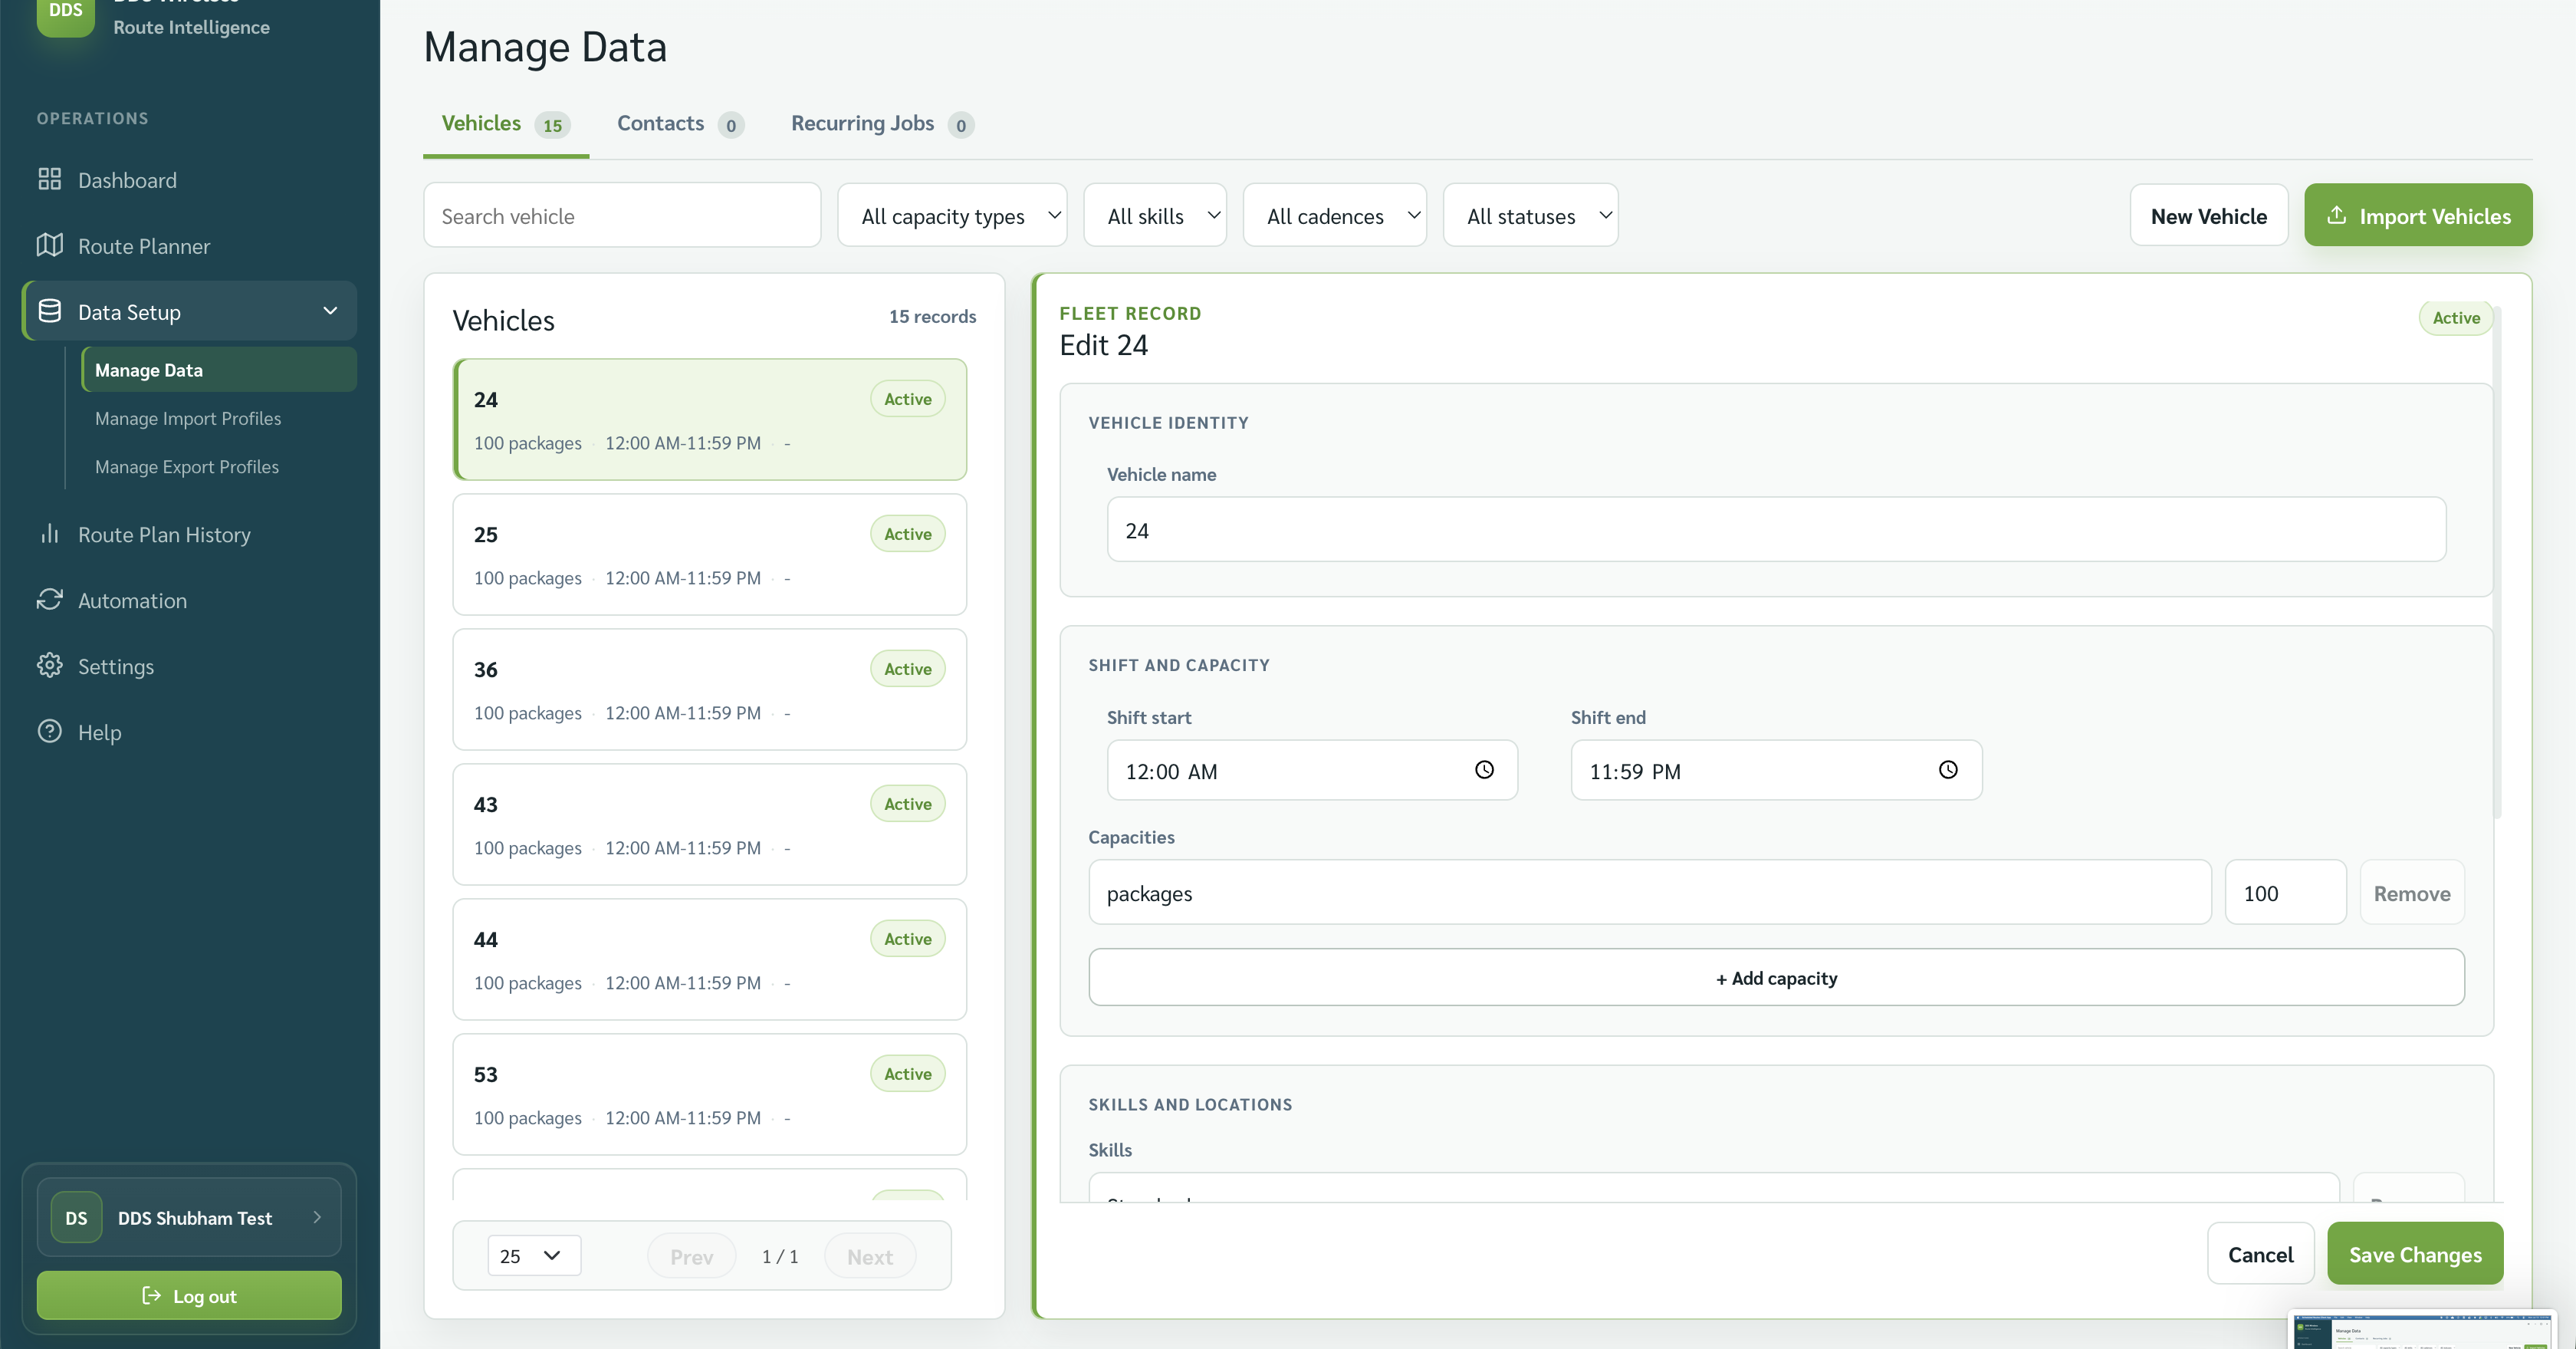
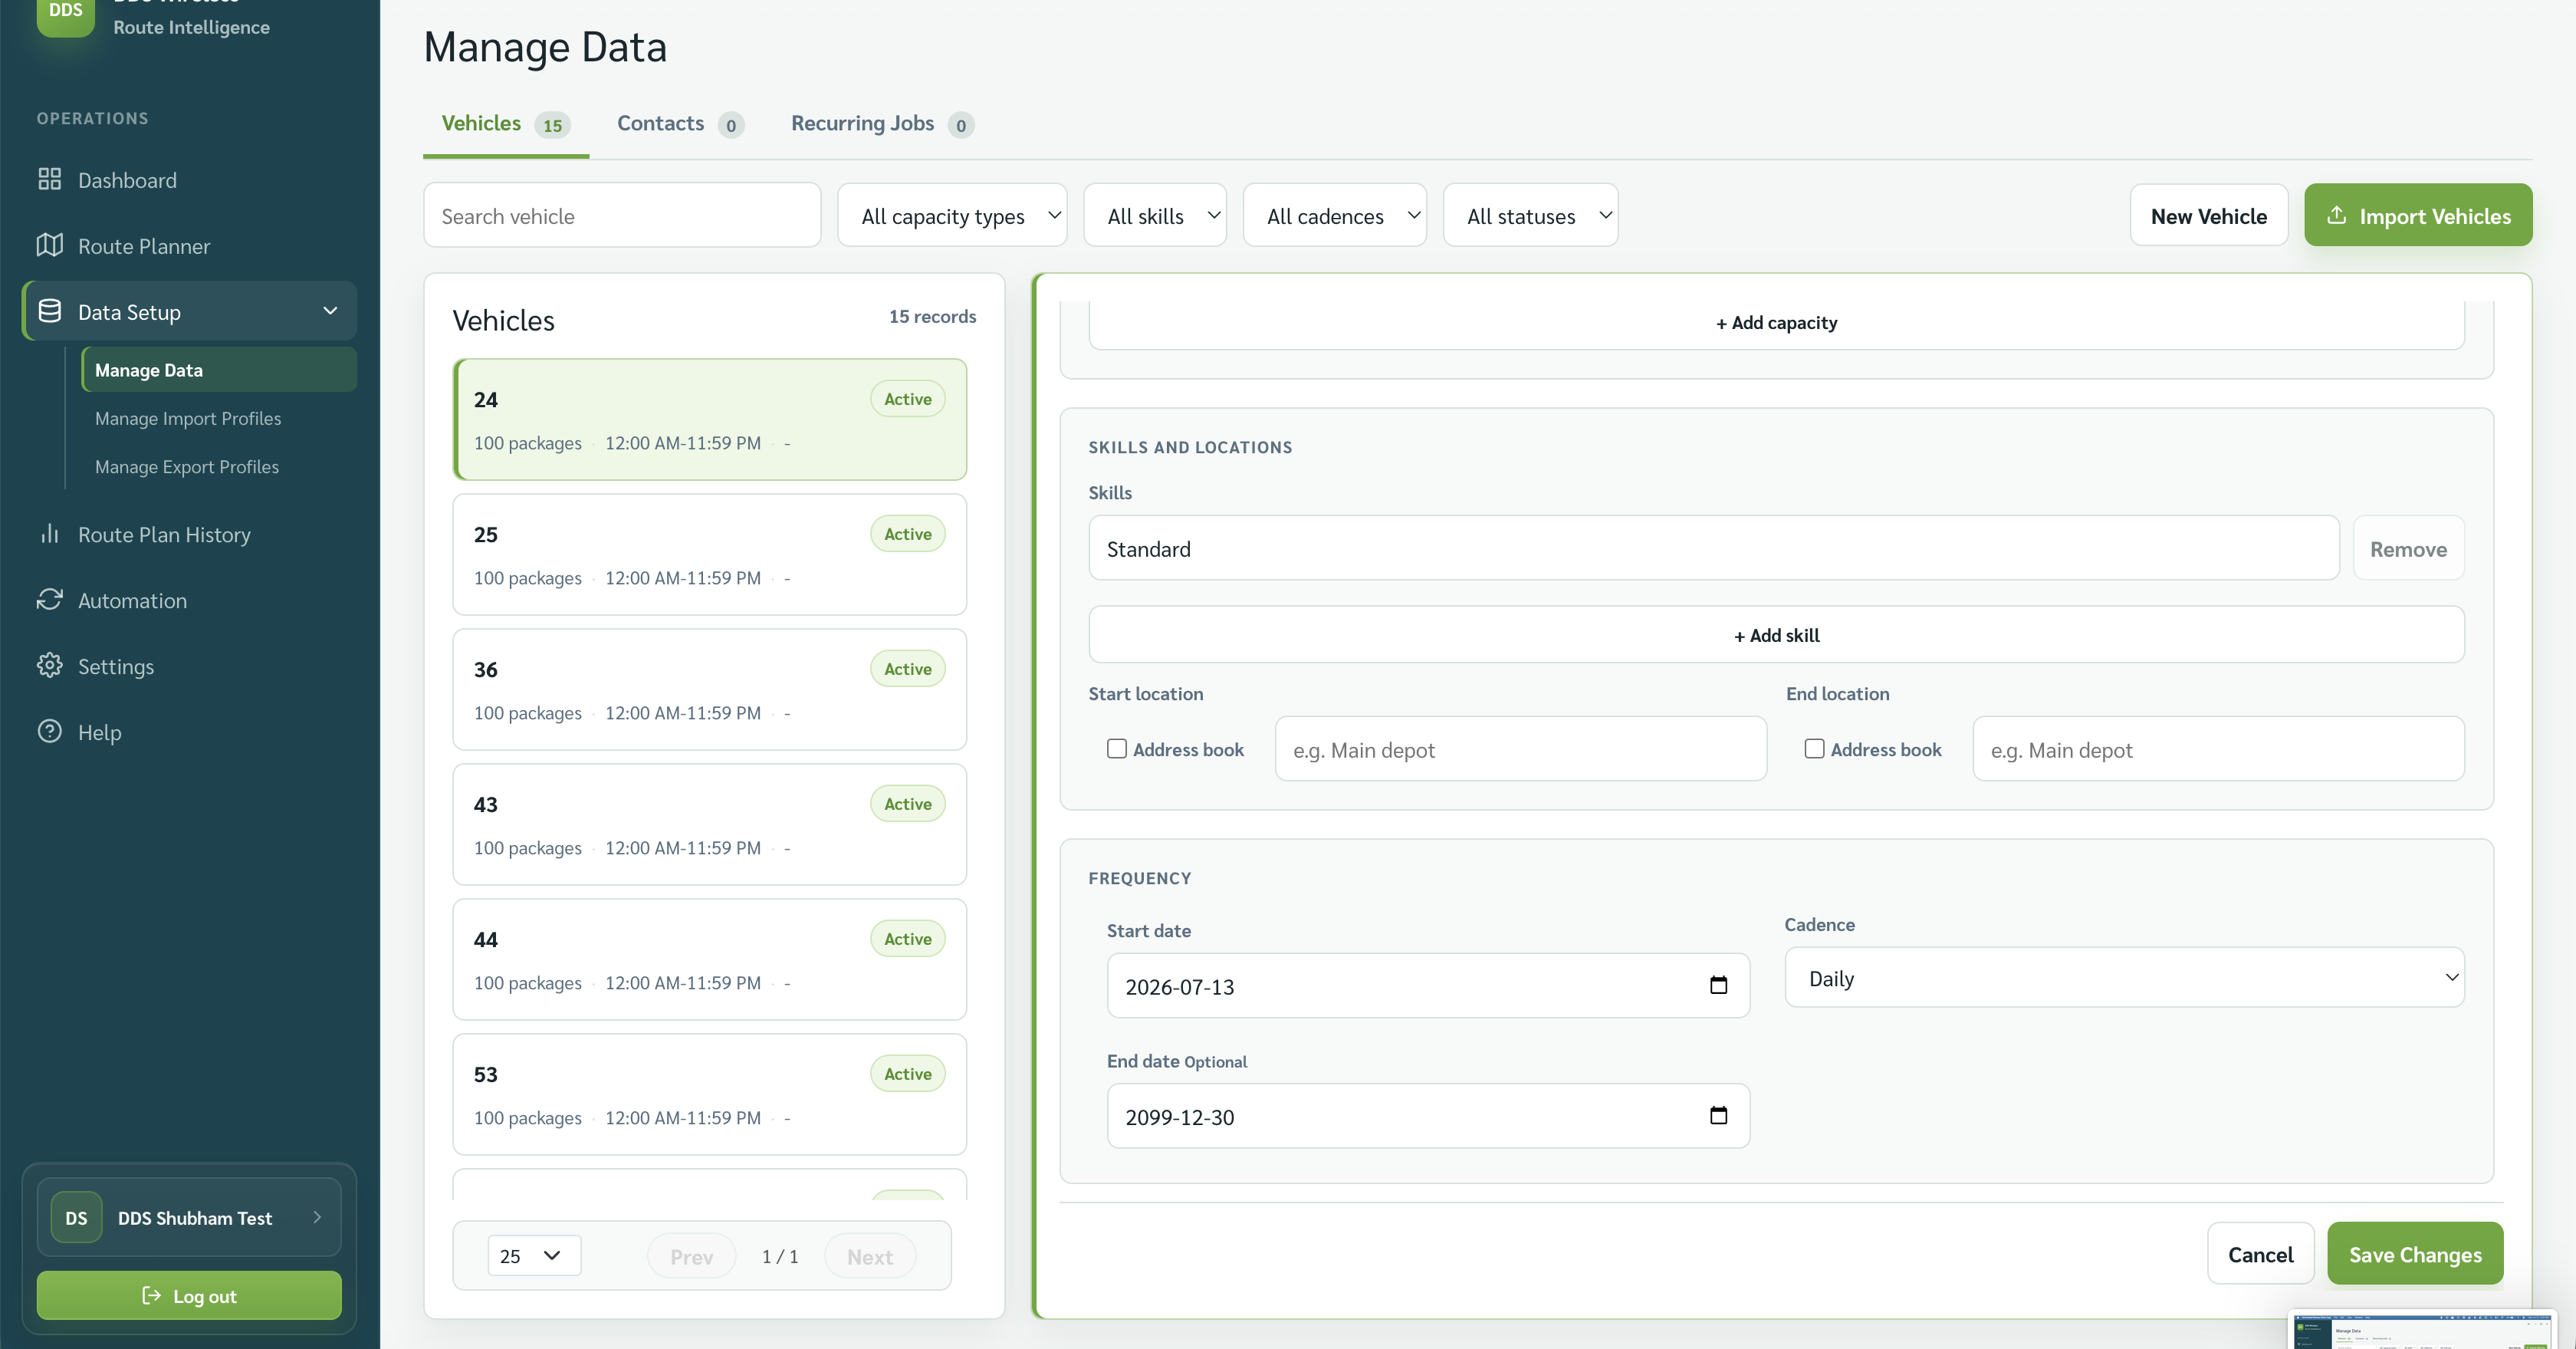
Check the start location
A missing start location is a common cause of unassigned jobs.
Other vehicle actions
- Select New Vehicle to add one record.
- Select Import Vehicles to load a fleet file.
- Select Disable Vehicle when the vehicle should remain recorded but not be planned.
- Select Delete Vehicle only when the record should be removed.
Deletion is permanent
A deleted vehicle record cannot be restored. If you might need the vehicle again, use Disable Vehicle instead.
Related: Import your vehicles · Vehicle file reference · Fix unassigned jobs