Import your vehicles
Applies to v1.7+ · ~5 min read · Import guides
Import your fleet and create the vehicle mapping that Scheduled Routes will reuse when the file layout stays the same.
Before you start
Have the vehicle file supplied by your operations team ready. The screenshots show a CSV file with vehicle name, capacity, shift start, and shift end columns.
Import vehicles during onboarding
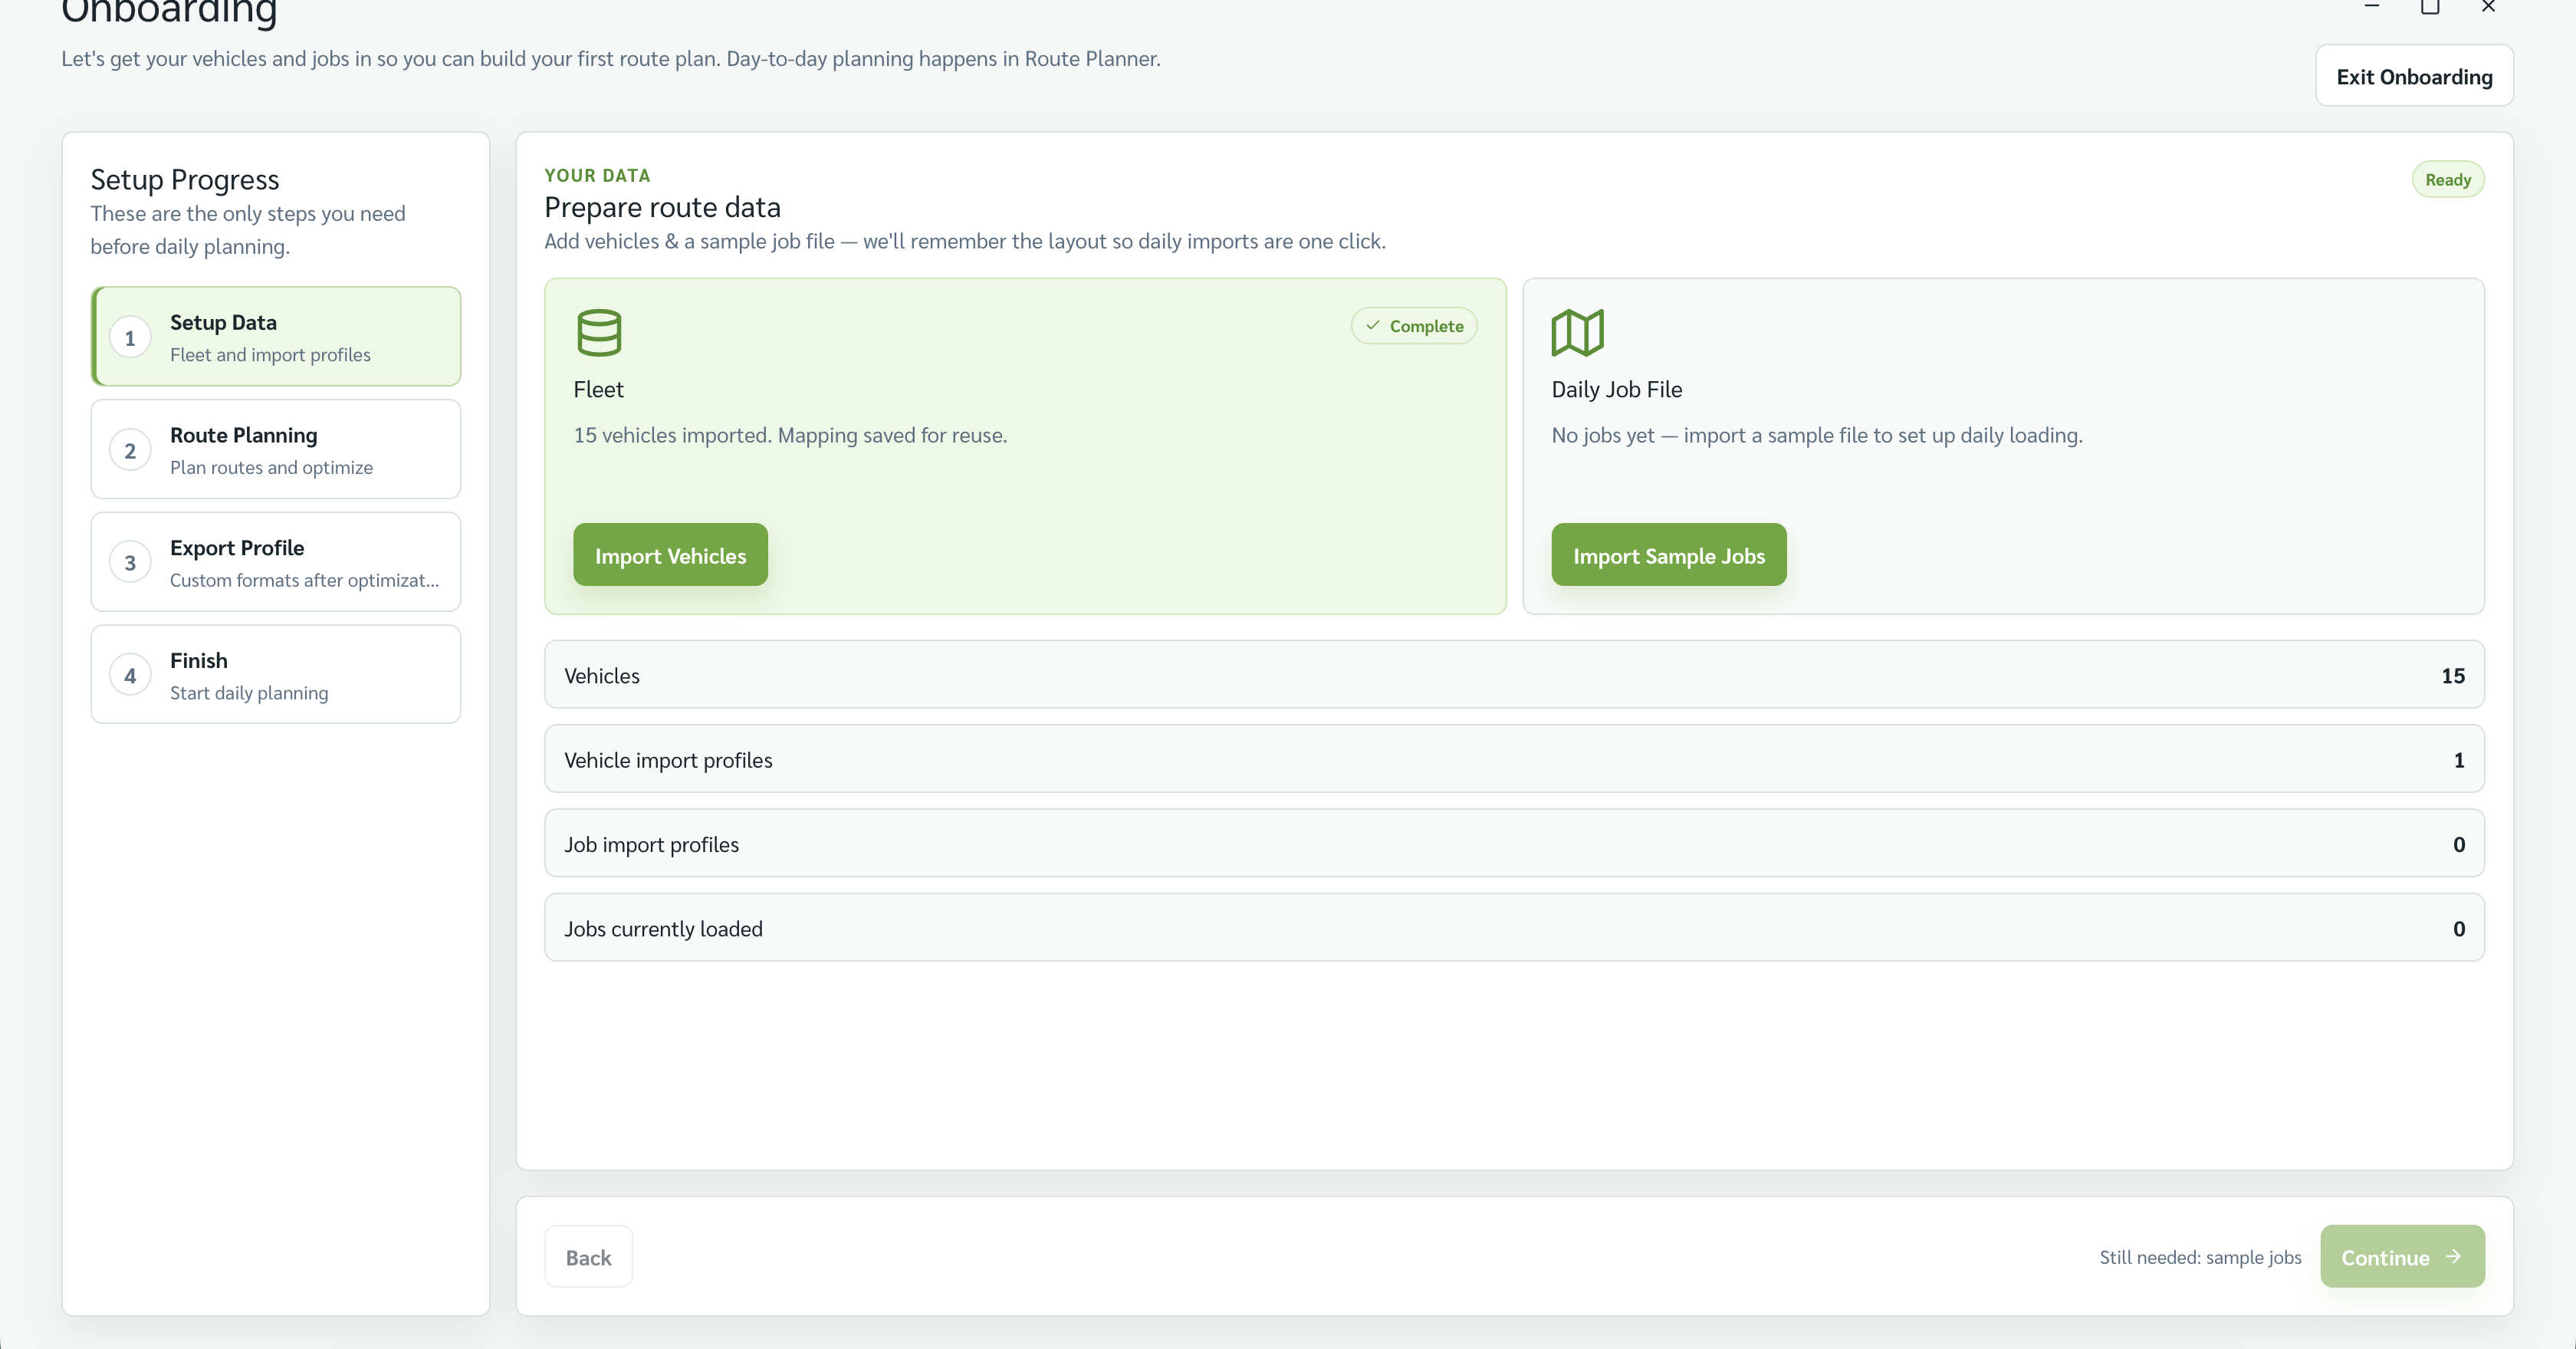
- On Step 1 · Setup Data, find the Fleet card and select Import Vehicles.
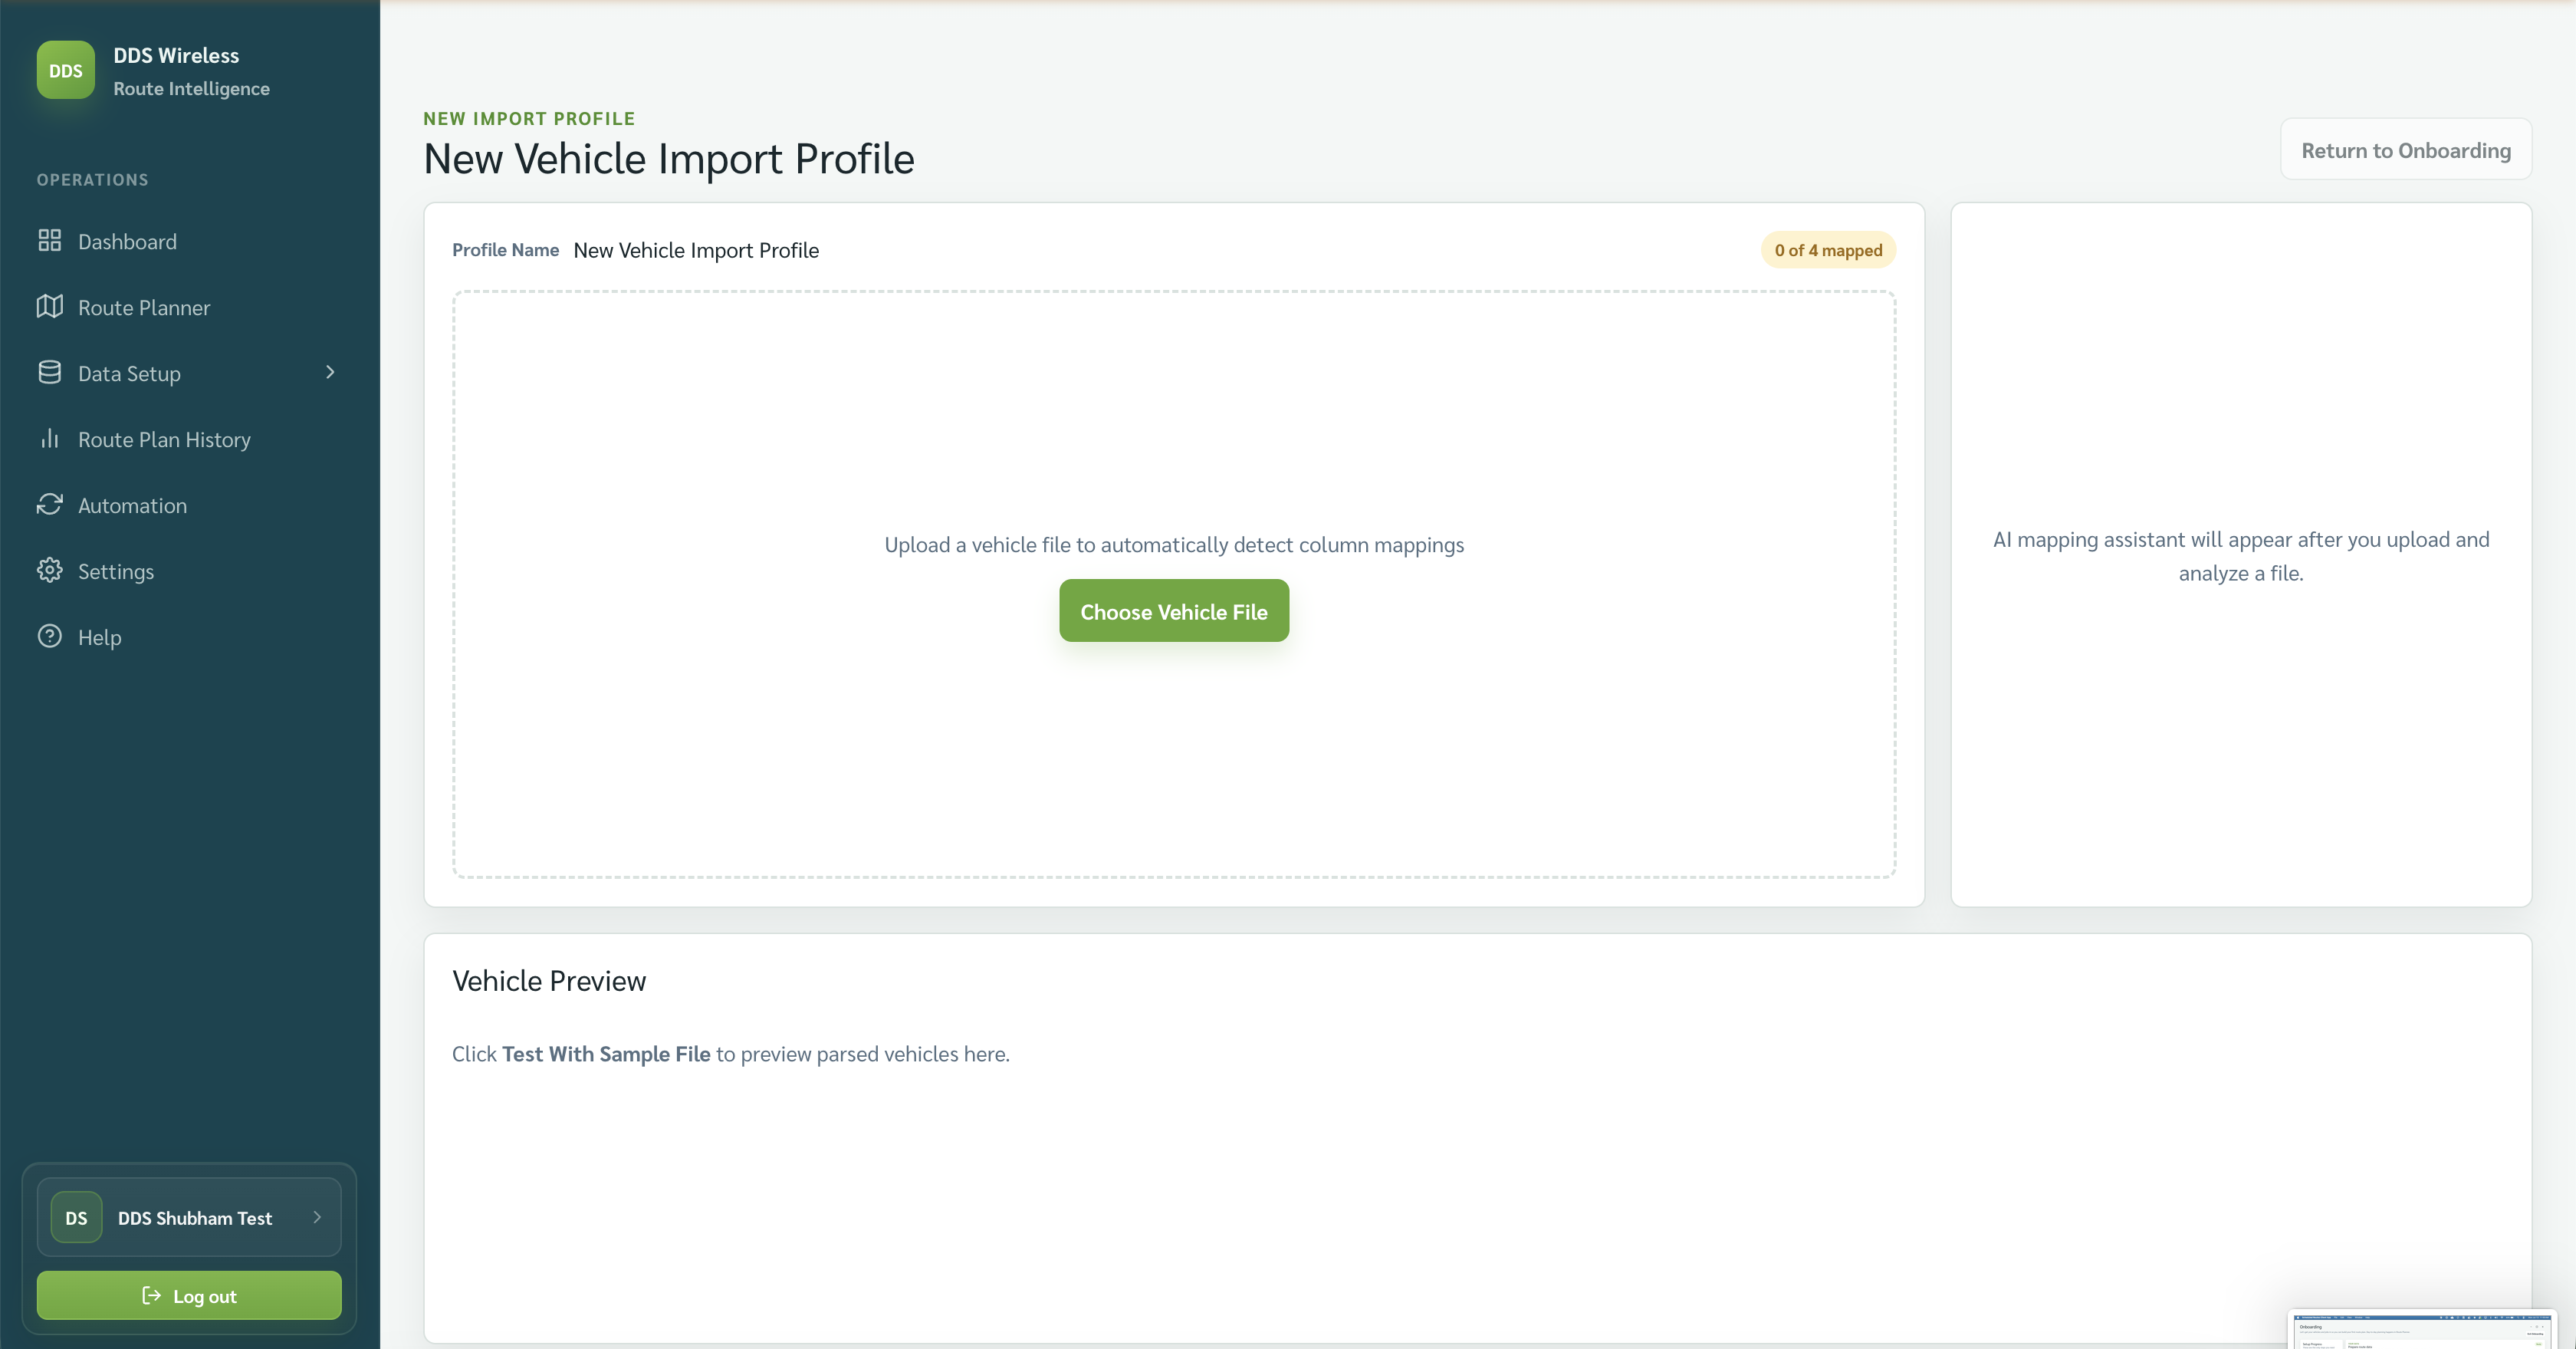
- On New Vehicle Import Profile, select Choose Vehicle File and choose the fleet file.
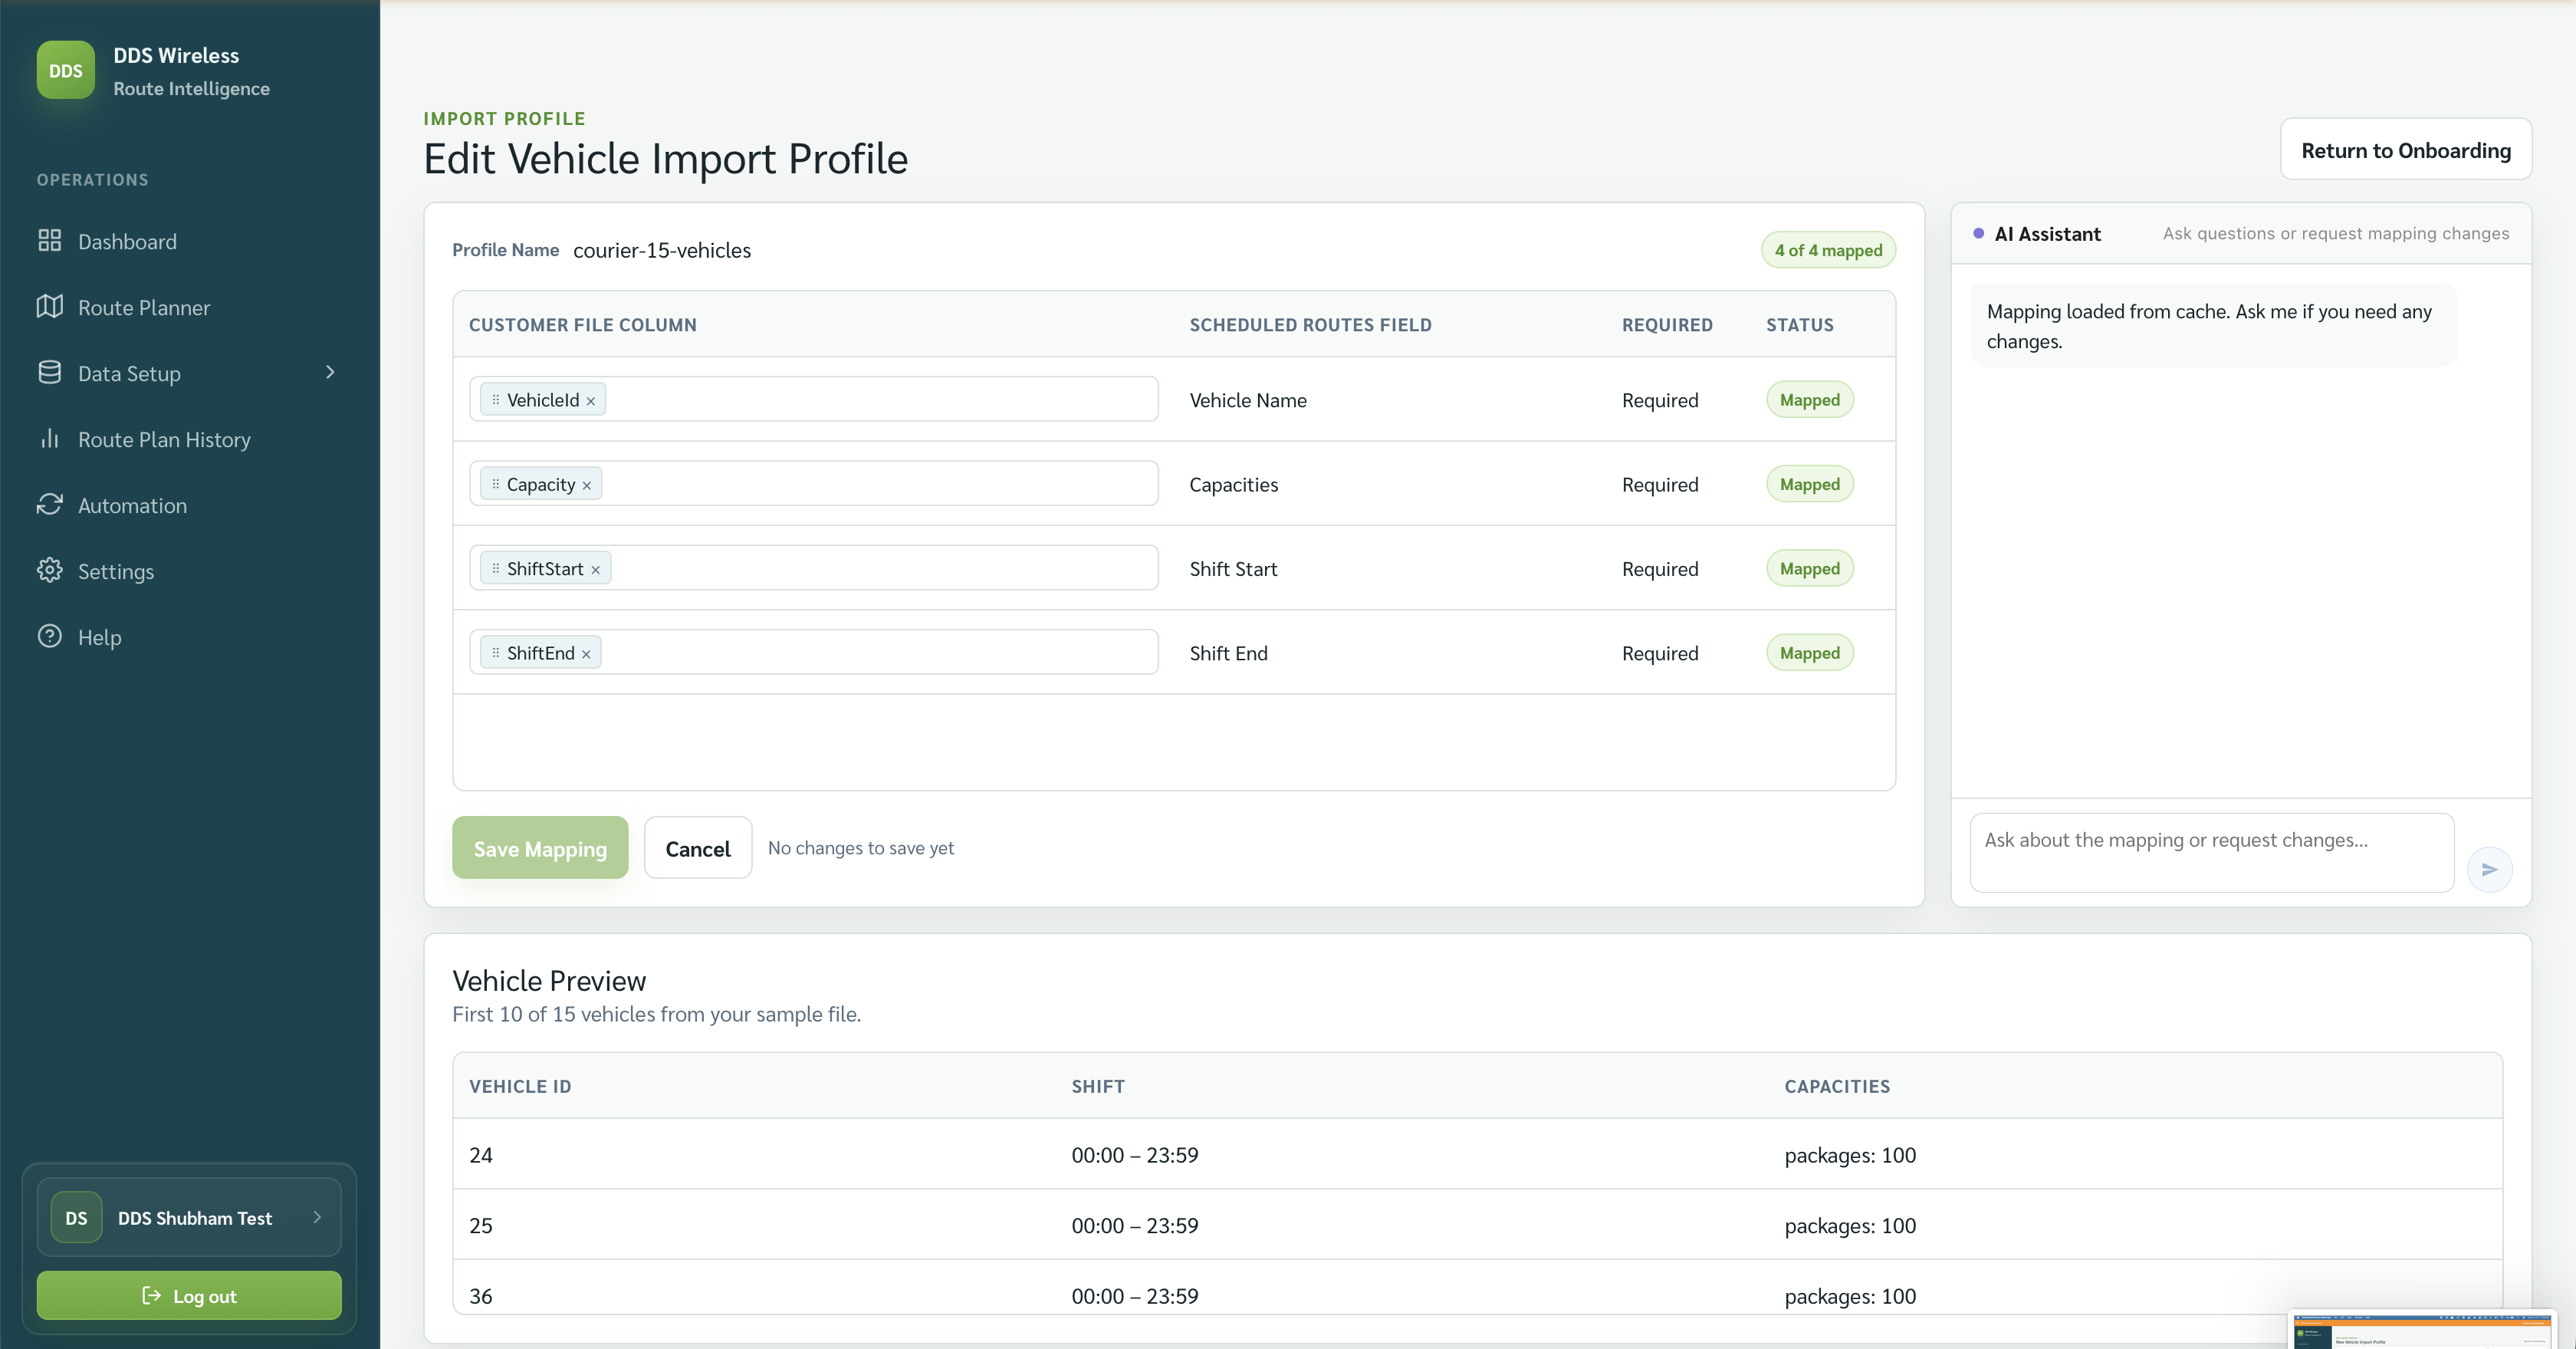
- On Edit Vehicle Import Profile, confirm the profile name and review every proposed match in the mapping table.
The supplied screen maps these customer columns:
| Customer file column | Scheduled Routes field | Status shown |
|---|---|---|
| VehicleId | Vehicle Name | Mapped |
| Capacity | Capacities | Mapped |
| ShiftStart | Shift Start | Mapped |
| ShiftEnd | Shift End | Mapped |
-
Review Vehicle Preview below the mapping. Confirm the vehicle IDs, shift times, and capacities look like the source file.
-
If a match is wrong, choose the correct value in the Customer File Column field. Use the AI Assistant panel to ask about a mapping or request a change.
-
Select Save Mapping.
Confirm the saved vehicle mapping
-
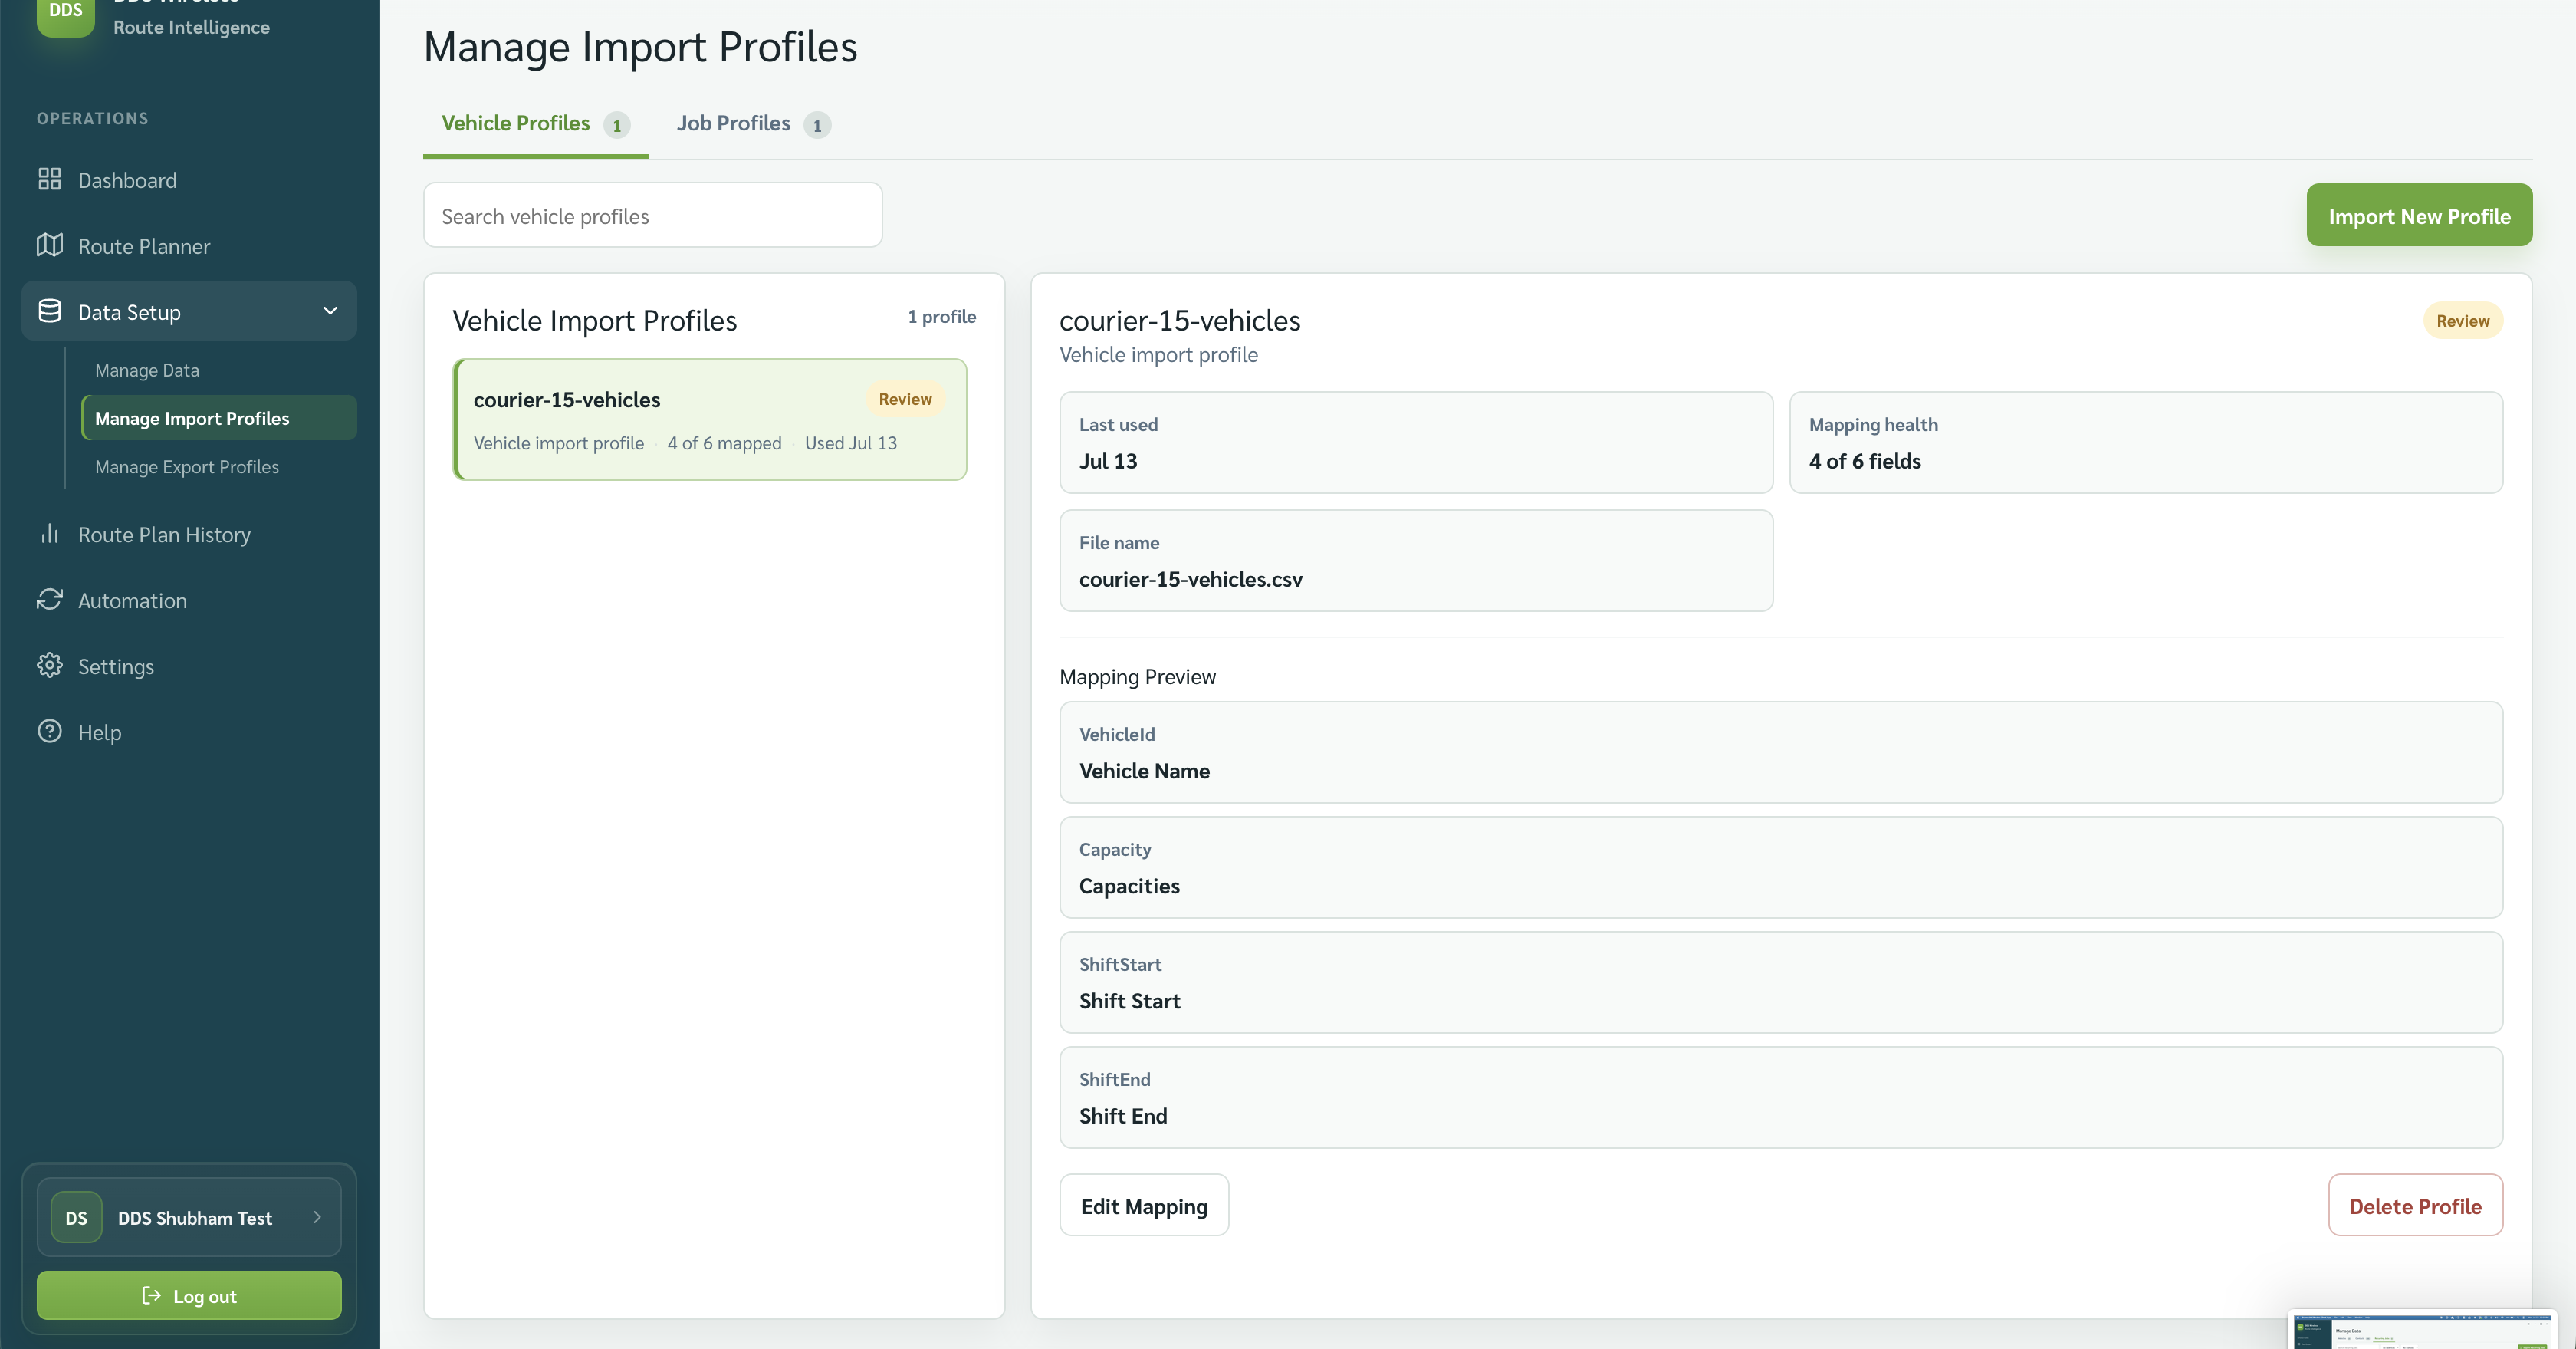
Open Data Setup → Manage Import Profiles and select Vehicle Profiles.
-
Select the saved profile and confirm its file name, mapping health, and mapping preview. Use Edit Mapping when the source columns change.
Check locations before planning
The import mapping screenshot confirms vehicle name, capacity, and shift fields. Before optimization, also review each vehicle in Data Setup → Manage Data → Vehicles and make sure its start location is present.
Result
Once you select Save Mapping, the mapping is saved and no further action is needed to finish. Your fleet is available under Manage Data → Vehicles, and future imports with the same layout reuse this mapping automatically.
Related: Manage vehicles · Vehicle file reference · Import your jobs · Saved mappings